When was the last time you made a loaf of fresh, steaming, wholesome, flavorful bread? Baking bread at home not only gives you control over the ingredients used in the bread you eat, but also provides the added benefit of filling the kitchen with the aromas of fresh baked loaves. However, our busy hectic modern-day schedules mandate that most of us resort to buying squishy loaves in plastic bags, or rely on local bakeries that craft artisanal style loaves, doing all the hard work for us.
Although bread baking does require some degree of organization, and an investment in time, it’s not difficult, and there is something rather magical about transforming flour, water, salt, and yeast into something divinely edible. A few years ago, after acquiring a copy of Peter Reinhart’s “The Bread Baker’s Apprentice“, I began crafting my own sourdough breads, from scratch.
There are typically three major steps to crafting sourdough bread at home. The first is creating the seed culture. Sourdough is a wild yeast bread, meaning that you do not need to purchase anything (with the exception of flour) to start your own culture. The culture is where you capture the wild yeasts that will leaven your bread. Once your culture is stable, the second step is to convert the culture into into a barm, where the captured yeast is nurtured. The barm is in essence a living organism, and is used in place of commercial yeast in the bread dough, the third and final step. The barm needs to be cared for, and fed, so that the yeast have a continual supply of nutrients. A well cared for barm will last indefinitely, and will always be available the next time you’re ready to make bread.
We cared for our last barm for a couple of years, and baked sourdough bread regularly. Sadly however, that barm was sorely neglected during our last move, and was eventually abandoned. Recently however, craving homemade bread again, we started a new seed culture, and now have a lovely bubbly barm residing in the fridge once more, always ready to be transformed into crusty loaves.
There are numerous good books available for those interested in crafting homemade wild yeast breads. The following method is adapted from Reinhart’s book, and I include it here to help provide an overview of the entire process of crafting homemade sourdough. If you are serious about crafting your own artisanal style bread at home however, I strongly encourage you to invest in a reference text or two (see recommended books below).
Step One: The Sourdough Seed culture
1 cup (4¼ ounces) dark rye or coarse whole rye (pumpernickel-grind) flour
3 cups (13½ ounces) unbleached bread flour
2¼ cups (18 ounces) water, at room temperature
Day 1: Mix the rye flour and ¾ cup (6 ounces) water together in a bowl until they form a stiff ball of dough. Do not worry if the dough is very stiff, but be sure that all the flour is hydrated. Press this piece of dough into a 4-cup measuring beaker and place a piece of tape on the beaker to mark the top of the dough. Cover the beaker with plastic wrap and leave it at room temperature for 24 hours.
Day 2: The dough should not have risen much, if at all, during this time. In a mixing bowl, combine the sponge from Day 1 with 1 cup (4½ ounces) unbleached flour and ½ cup (4 ounces) water, mixing with your hand or a spoon until all the ingredients are evenly distributed. The dough will be somewhat softer and wetter than before. Return this to the beaker, press it down, and replace the old tape with a new piece of tape to mark the spot. Cover with plastic wrap and ferment for 24 hours at room temperature. Do not be put off by the strong, unpleasant aroma of the dough; this will eventually brighten. Aerate the culture, stirring thoroughly, three or four times during the next 24 hours to discourage anaerobic flora in the culture.
Day 3: Check to see if there has been a rise in the dough. There will probably be some fermentation but not a lot, perhaps a 50-percent rise. Regardless, discard half of the starter and mix the remaining half with 1 cup (4½ ounces) unbleached flour and ½ cup (4 ounces) water, just like on Day 2. It will be a little wetter. Again, return it to the beaker. It should press down to the same height as on Day 2. Re-tape the beaker to mark the top of the dough, cover, and ferment for 24 hours. Aerate the culture three times over the next 24 hours.
Day 4: The sponge should have at least doubled in size; more is even better. If it is still sluggish and hasn’t doubled in size, allow it to sit out for another 12 to 24 hours, and aerate the culture. Otherwise, repeat as on Day 3, discarding half of the starter and mixing the remaining half with 1 cup (4½ ounces) unbleached flour and ½ cup (4 ounces) water, returning it all to the beaker as before. Cover and ferment until it at least doubles in size; this may take 4 to 24 hours. It is OK if it triples in size, but because it is now fairly soft and spongelike, it will not be able to sustain that large of a rise without collapsing. If it falls easily when you tap the beaker, that is the sign that your seed culture is ready to be turned into a barm.
Step Two: The Barm
3½ cups (16 ounces) unbleached high-gluten or bread flour
2 cups (16 ounces) water, at room temperature
1 cup (7 ounces) Seed Culture
Stir together the flour, water, and seed culture in a mixing bowl. (You can discard the remaining seed culture or give it to a friend to build into his or her own barm.) Make sure the seed culture is evenly distributed and all the flour is hydrated. It will make a wet, sticky sponge.
Transfer the sponge to a clean plastic, glass, or ceramic storage container twice as large as the barm. While transferring the barm into the container, repeatedly dip your hand, spatula, or bowl scraper in water to keep the barm from sticking to it.
Cover the container with a lid or plastic wrap and ferment at room temperature for approximately 6 hours, or until the barm is bubbly. The plastic wrap (or plastic lid) will swell like a balloon; when this happens, open the lid or release the plastic to let the gas escape.
Replace the cover and refrigerate overnight before using. The barm will be ready to use the next day and will remain potent for three days.
Don’t Forget to Feed Your Barm!
Your barm is alive, and will need to be fed to maintain it over time. Stored in the refrigerator, the barm should be fed each time you remove some for bread baking, or at least once per week. The simplest rule for refreshing the barm is to always at least double the barm at feeding. For example, to refresh 1 pound of barm, add 8 ounces (1 3/4 Cups) of high-gluten or bread flour, and 8 ounces (1 Cup) of water. Allow the barm to sit, covered, at room temperature for 4 hours, until bubbly, and return the barm to the refrigerator.
Day 1: The Firm Starter
2/3 cup (4 ounces) barm
1 cup (4½ ounces) unbleached bread flour
1/8 to 1/4 cup (1 to 2 ounces) water
Remove the barm from the refrigerator and measure it out 1 hour before making the firm starter to take off the chill. To do this, dip a 2/3-cup measuring cup into a bowl of water, then scoop it into the barm to fill (the wet cup will allow the barm to slide out easily). Transfer it to a small bowl, cover with a towel or plastic wrap, and allow it to warm up for 1 hour.
Add the flour to the bowl and mix together the barm and the flour, adding only enough additional water so that you can knead this into a small ball. You do not need to work this very long, just until all the flour is hydrated and the barm is evenly distributed. Lightly oil a small bowl or mist the inside of a plastic bag with spray oil, and place the starter in the bowl or bag, turning to coat it with oil. Cover the bowl or seal the bag.
Ferment at room temperature for approximately 4 hours, or until the starter has at least doubled in size. If it takes more time than 4 hours, give it additional time, checking every hour or so. Then put it in the refrigerator overnight.
Day 2: The Final dough
4½ cups (20¼ ounces) unbleached high-gluten or bread flour
2 tsp. (½ ounce) salt
4 tsp. Vital Wheat Gluten*
1½ to 1¾ cups (12 to 14 ounces) lukewarm water (90 to 100 degrees)
Semolina flour or cornmeal for dusting
*Note: True high-gluten flour can be difficult to find in local markets. As such, I typically use King Arthur Bread Flour, which has a 12.7% protein content, and then to raise the protein level in the flour closer to 15%, thus improving the structure of the sourdough bread, I add approximately 1 tsp. Vital Wheat Gluten (VWG), per 4.5 ounces (1 Cup) of flour. It is not essential to use VWG to make sourdough bread however, simply a method that I’ve had very good results with.
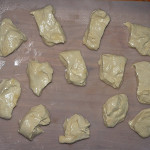
Remove the firm starter from the fridge an hour before you plan to make the final dough
Remove the starter from the refrigerator 1 hour before making the dough. Cut it into about 10-12 small pieces with a pastry scraper or serrated knife. Mist with spray oil, cover with a towel or plastic wrap, and let sit for 1 hour to take off the chill.
To make the dough, stir together the flour and salt in a 4-quart mixing bowl (or in the bowl of an electric mixer). Add the starter pieces and enough water to bring everything together into a ball as you stir with a large metal spoon (or mix on low speed with the paddle attachment).
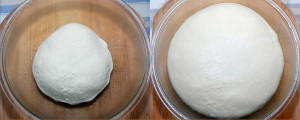
Sprinkle the counter with flour, transfer the dough to the counter, and knead by hand for 12 to 15 minutes (or mix with the dough hook for 4 minutes on medium-low speed, allow the dough to rest for 5 to 10 minutes, and then mix for 4 minutes). Adjust the water or flour as needed. The dough should be firm but tacky. Lightly oil a large bowl and transfer the dough to the bowl, rolling it around to coat it with oil. Cover the bowl with plastic wrap.
Ferment at room temperature for 3 to 4 hours, or until the dough has nearly doubled in size.
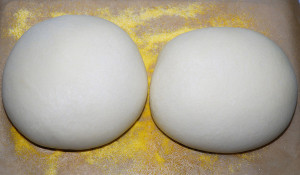
Gently remove the dough from the bowl and divide it into 2 equal pieces (about 22 ounces each), or divide it into smaller pieces if you are making rolls. Gently shape the dough into round boules or oblong batards.
Proof the dough on parchment-lined sheet pans that have been dusted with semolina flour or cornmeal. Mist the exposed part of the dough with spray oil and loosely cover the dough with a clean dish towel or plastic wrap. Proof the loaves for 2 to 3 hours.
Prepare the oven by placing a large cast-iron pan or heavy-duty baking pan on the bottom rack. Place a pizza stone on the rack above the pan. Preheat the oven to 500 degrees.
Ten minutes before baking, remove the towel or plastic wrap from the loaves. Generously dust a baking peel or the back of a sheet pan with semolina flour or cornmeal, and gently transfer the dough to the peel or pan. (If dough was proofed in a sheet pan, it can be baked directly in that pan.) Score the dough and slide it onto a baking stone (or leave it in the sheet pan) and place it in the oven.
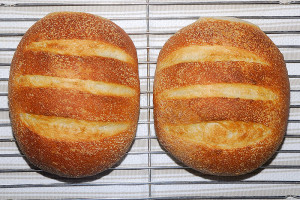
Pour 1 cup hot water into the cast-iron or heavy-duty baking pan on the bottom oven rack and close the oven door for two minutes to retain the steam. Lower the oven temperature to 450 degrees and bake for 10 minutes. Rotate the loaves 180 degrees for even baking and continue baking for another 10 to 20 minutes, or until the loaves are done. They should register 205 degrees in the center, be a rich golden brown all over, and sound hollow when thumped on the bottom.
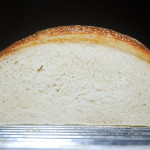
Transfer the finished loaves to a rack and cool for at least 45 minutes before slicing or serving. Pass the butter, and enjoy!
Recommended Bread Books:
The Bread Bible, by Rose Levy Beranbaum
The Bread Bible: 300 Favorite Recipes, by Beth Hensperger
The Bread Baker’s Apprentice, by Peter Reinhart

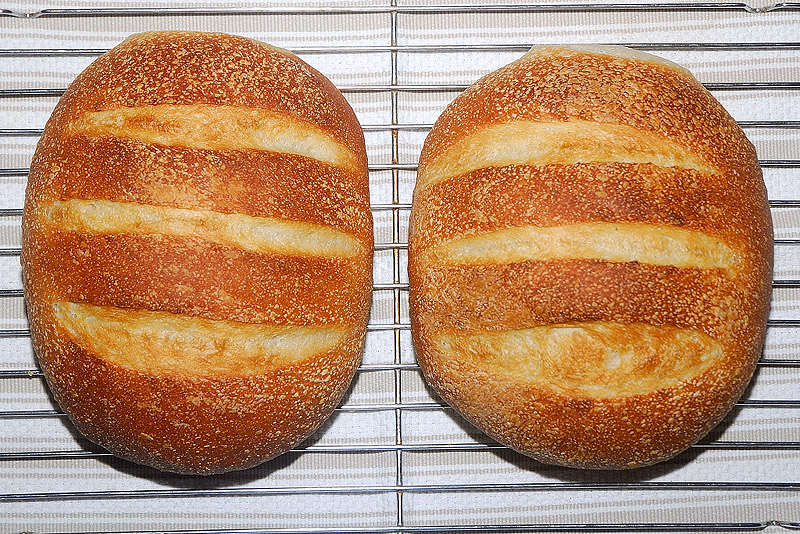


i’m exhausted from reading that explanation of how to make & bake the bread. my doG woman, all that work?!?!
hell, i’ll just fly you up to seattle and you can bring some loaves with you! 🙂