One of the best qualities of butternut squash, besides its sweet flavor and smooth texture, is that it stores remarkably well. Butternut squash is easy to grow, and we end up using a lot of it throughout the fall and winter months. Two of our favorite recipes for this versatile squash are butternut squash soup, and butternut squash ravioli.
Although pseudo-fresh ravioli isn’t difficult to find at local markets, homemade ravioli is difficult to beat, both for flavor, and texture. With a few simple tools and ingredients, ravioli is easy to make. This past weekend, as we still had some squash sitting on the kitchen counter, we had a marathon ravioli making session in the kitchen. With a little investment in time, we managed to freeze dozens of ravioli to make quick 5 minute meals for those busy days in the coming months.
Yield: Approximately 4 Dozen Ravioli
Equipment
Stand mixer with pasta roller attachment or counter top pasta roller
Ravioli mold (or sharp pizza wheel)
Cooking spray oil
2-3 large cookie sheets
Rolling pin
Pastry brush
Pasta Dough:
16 oz Unbleached All-Purpose Flour, or ’00’ Flour (plus extra for dusting)
5 Large Eggs
1 Tsp Kosher Salt
1 Tbsp Extra-Virgin Olive Oil
Egg Wash:
1 Whole Egg, Beaten
1 Tsp Water
Butternut Squash Filling:
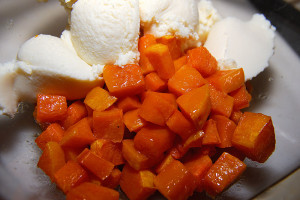
2 Cups of Roasted Butternut Squash
16 oz. Fresh Ricotta Cheese
1/2 Cup Grated Fresh Parmesan or Romano cheese
1/4 Tsp Fresh Grated Nutmeg
2 Tsp Orange Zest
1 Tbsp Chopped Fresh Sage
1 Large Egg
Pinch Kosher Salt
Before assembling the dough, start by roasting the squash, so it has a chance to cool.
Roast the Squash:
Preheat Oven to 425 F
Peel and seed a medium butternut squash, and roughly chop the squash into cubes. Drizzle with a little olive oil. Line a sheet pan with aluminum foil and place the squash on the pan, distributing it across the pan evenly. Place the sheet pan into the oven and roast for 20-30 minutes, or until the squash is lightly caramelized and tender.
Prepare the Dough:
Prepare the dough while the squash is roasting. Combine the flour, salt, eggs and olive oil in the bowl of a stand mixer fitted with a dough hook. Mix on low speed until the dough begins to form a ball. Turn out the dough, and wrap tightly in plastic, and rest in the refrigerator for a minimum of 1 hour (up to 6 hours) before rolling.
Prepare the Filling:
While the dough rests, assemble the filling. Place 2 generous cups of the roasted squash, and the ricotta into a medium sized bowl, and mash together to an even consistency (you can use a food processor fitted with a metal blade).
Add the cheese, nutmeg, orange zest, sage, egg, and salt to taste, mixing until evenly blended.
Roll out the Dough:
Remove the dough from the refrigerator, and cut into 4 equal pieces. Cover in plastic, and leave at room temperature for 15 to 20 minutes before rolling.
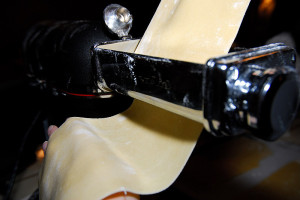
Take 1 piece of dough and flatten into a rectangle with the palm of your hand to approximately 1/2 inch thick. Dust the dough lightly with flour on both sides. Set the pasta rollers at the widest setting (we use the Kitchenaid roller attachment, set to ‘1’).
Pass the dough through the machine rollers, and then fold the dough, letter-style, into thirds. Dust with more flour, and repeat 2 to 3 times (do NOT adjust the rollers), dusting with flour as needed.
Proceed from this point WITHOUT folding the dough.
Set the rollers to the next narrowest setting (‘2’ for the Kitchenaid) and pass the dough through. Repeat, reducing the space between the rollers after each pass. If the dough starts to drag or stick to the rollers, dust with more flour.
As the dough becomes too long to handle (usually by the ‘4’ roller setting for us), cut each sheet of dough in half cross-wise using a sharp knife (or pizza wheel cutter). Using the Kitchenaid we roll the dough down to the ‘5’ setting, no less than 1/32 of an inch thick. If using a mold to assemble the ravioli, be sure not to cut the sheets too short!
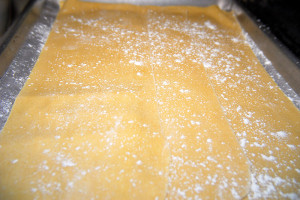
The goal is to end with 8 approximately equal size sheets of pasta. Place the finished pasta sheets on a floured cookie sheet, and lightly dust between them to prevent sticking.
Cover the pasta sheets with plastic, or a damp lint-free dish towel to prevent the pasta from drying and cracking while you assemble the ravioli.
Assembling the Ravioli:
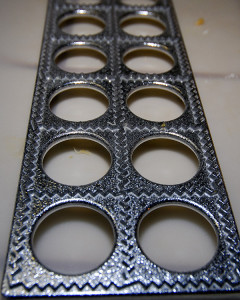
Recently we’ve become fans of ravioli molds. They’re effective, economical, easy to use, and make beautiful perfect ravioli every time.
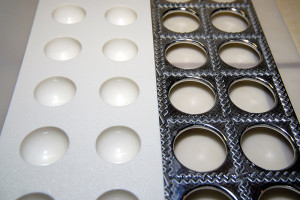
Ravioli molds prevent over-filling, and turn out more consistent ravioli than assembling them free-hand
Do you need to use one? No. Until recently we made ravioli free-hand, but molds make assembly faster, and give more consistent results.
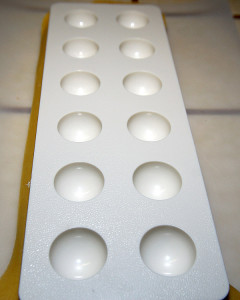
If you use a mold, lightly oil the top surface of the metal half of the ravioli mold, and lay it flat on the work surface.
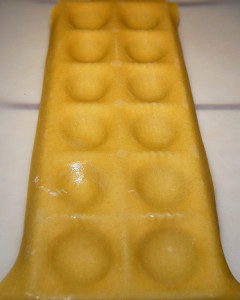
Lay a sheet of pasta across the mold, ensuring the edges are covered on all sides.
Take the plastic half of the mold and place on top of the sheet of dough, and press down into the dough.
You’re not trying to cut the dough, just to make impressions in the dough for filling, then set the plastic part of the mold aside.
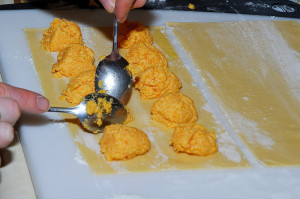
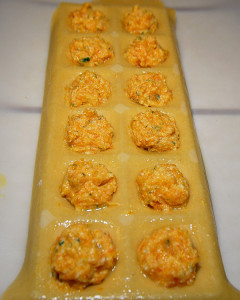
Using two small spoons fill each well in the mold with the butternut filling.
Whisk the whole egg with the teaspoon of water. Using a pastry brush, brush the edges of the dough around each well with the egg wash.
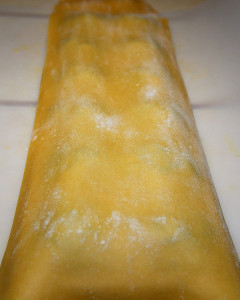
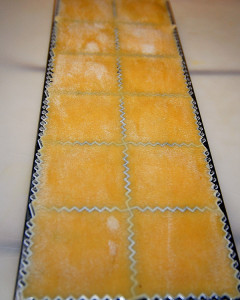
Lay a second sheet of dough over the filling, again covering all the edges.
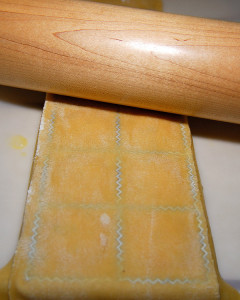
Using a rolling pin, begin at one short end of the mold, and roll, using even and moderate pressure, from one end of the mold to the other.
Turn the mold a quarter turn and repeat. It may take a few passes with the rolling pin, but roll until the excess dough around the edges is easily pulled away.
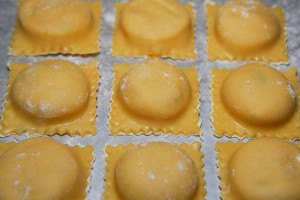
Turn the mold upside down over a lightly floured cookie sheet, and gently push each ravioli on one edge to pop them out of the mold.
Respray the mold with oil (really, otherwise the ravioli will stick — yes, that is the voice of experience), and repeat.
To Freeze and Store:
If you’re going to freeze the ravioli, to prevent them from sticking together, lay a single layer on a cookie sheet, and freeze, uncovered for a few hours. Then place the ravioli in zip-top bags or freezer containers. The ravioli will freeze well for up to 4 months. You don’t need to thaw before cooking.
To Cook the Ravioli:
Bring a large pot of salted water to a boil. Gently slide the ravioli into the water, cook until tender and they begin float, approximately 3-5 minutes. Don’t boil too vigorously, or the ravioli may burst.
Our favorite way to serve butternut squash ravioli is with a simple sage and brown butter sauce:
4 Tbsp Butter
12 Fresh Sage Leaves
Melt the butter in a small saute pan, add the sage and continue to cook until the butter starts to turn golden brown, and the sage is slightly crisp, being careful not to burn the leaves. Drain the pasta, and drizzle with the brown butter sauce and sage. Top with a little cave-aged Gorgonzola, and grated Parmesan cheese…
Serve with fresh sourdough bread, and enjoy! I hope you made enough for seconds…

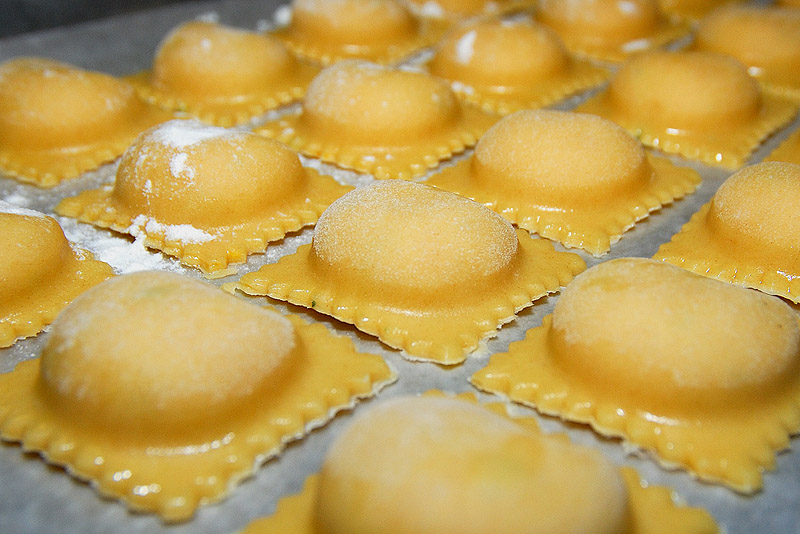



Ok, now you are really killing me. This is one of my all-time favorites-served with browned butter & fresh sage….
One of our favorites too! 😀
Now I know what to do with all those fresh eggs! You’re my hero. Seriously – this looks amazing and I’m going right now to add a ravioli mold to my wedding registry! Thanks for the inspiration.
I think a ravioli mold is a much better wedding present than another toaster 😉 Yes, it does use quite a few eggs too. We like egg-centric recipes here. Baked frittata, pasta, crème brûlée…oooh…maybe I should post our crème brûlée recipe soon!
I am hungry. These look good… and I like the whole pan thing. I believe I need a ravioli pan. Yes, I do.
Yes you do! I’m not a big advocate of kitchen gadgets. I donated our old bread machine, and pasta maker as we weren’t using them. I really only use the stand mixer and a food processor in the kitchen. The ravioli mold though is definitely worth it, and doesn’t take up any space in the cabinet either!
How timely for me, I’ve been saving a couple of butternut squash to make ravioli with. Your recipe looks and sounds much better than what we made last time, so we will give it a try! Now I need to make a trip to the Kitchen gadget store to find a mold, and we’ll be set. Thanks so much for sharing!
Let us know how you like it!
This is a new recipe for me. I love squash so I will give it a try. Time to start making the dough again.
I hope you try it. The good thing is, unless you’re feeding a small army, you’re guaranteed enough left over to freeze for a later meal.
Totally decadent! Maybe you should start farm dinners?
Ha! Not with our current kitchen, we barely have the space to cook for ourselves. Maybe after the kitchen remodel 😛
I have one sweet meat winter squash left and guess what I’m making this weekend. Thank you, for this awesomely delicious post.
You’re welcome, I hope you like it! It’s got to be safer than making ketchup 😉
Yum, another great recipe to try. For some reason, there are a lot of butternut squash in Barbados, so it will be very easy to try it. I tend to take the lazy route with the squash, cut it in half, and roast it with the skin on. Then I just scoop out the flesh and mash that, to many years peeling it as a kid.
You’re right Deborah, you can just split and roast the squash, I’ve just been in the habit of peeling and dicing as that’s how I use it in some other recipes, and it cooks a little quicker. Like many winter squash, it is challenging to peel!
Yummy! Oh Clare, What a great post! Even I think I could do this, after reading your great directions. You must know that my mouth was watering from your photographs! You are . . . among so many other talents . . . a gourmet cook as well! Delicious Post!
It’s very easy Carol, and oh so worth it! I was hungry by the time I finished writing the post! For as simple as it is, it seems to impress the house guests too 😉
I have one butternut squash left and have been trying to decide what to do with it, this is it! I need to use up some eggs, too, so this recipe is perfect. I can’t wait to try it. Oh, and you should definitely post your creme brulee recipe! Thanks!
We have a similar affliction…too many eggs! It seems quite a few of us still have a stray squash sitting in the kitchen too…glad it’s not just me! This recipe is great way to use both. I’m definitely going to have to make crème brûlée soon, and I promise to blog the outcome. I can hear my arteries hardening already 😀
Hi there,
My sweet husband has been flexing his Italian pasta muscles with his new Imperia pasta maker. THIS IS PERFECT TIMING. I’m going to go get him a ravioli mold. Great recipe and thanks so much.
Sharon Lovejoy Writes from Sunflower House and a Little Green Island
I’m sure he’ll have a lot of fun with a ravioli mold. I’m actually now tempted to get another. We rolled all the pasta dough out at once, and doubled the batch of dough. That resulted in a LOT of pasta. Would have gone a little faster with two of us assembling the ravioli though. If you shop around, you can find molds in a few different shapes too, just for fun!
I am putting this on my list to make. I have made another recipe but this one sounds better. Love butternut squash. I roast it often and, seriously, I can eat the whole thing!
It’s definitely my favorite squash so far. We even make a winter pizza with it!
That looks absolutely delicious! I’m glad you’ve provided such detailed instructions and pictures to guide those of us who are ravioli-challenged along! I think I’ll take that plunge now and put ravioli mold on my list of culinary “must buys.”
Our mold didn’t come with instructions (hence the ‘voice of experience’ regarding the cooking spray). I figure if anyone else was unfortunate enough to purchase one for the first time without seeing one used, maybe this would help 😉 They are intuitive to use, but without the spray, we mangled the first dozen a bit. Still tasted great though!
Dear Clare, I am very partial to Butternut Squash, but always as a soup. This looks to be an excellent way to enjoy this most delicious of vegetables, particulaly so as I have a weakness for pasta. Of course, there is absolutely no way I could make my own Ravioli but I am fortunate to have a local delicatessen where the owner makes her own fresh pasta. I shall pass on your idea and who knows, a new filling may appear one day!
My first experience with butternut squash was a succulent soup. It’s one of my all time favorite ways to eat it. Like you though, I have a weakness for pasta too…so butternut and pasta together, in my opinion, combine to create a perfect meal!
I love your blog. I learn something new every time I visit. Today I realized that I do need to get the pasta attachment for the mixer and that I need to find the ravioli molds. That looks so fun. My husband used to make homemade pasta all the time, but we’ve forgotten about making it for awhile. I love butternut squash too. Recently we bought butternut pasta sauce and it was delicious.
The pasta attachment for the mixer is great. The bench top rollers always make me feel like I need a third hand, although they are a great workout 😉 The fun part with ravioli is you can make a couple of different fillings at a time if you’re making the ravioli to freeze it, and want a little variety. I bet kids would have fun making ravioli using the mold too, and the mold will teach them how not to overfill their ravioli!
This looks so good. The step by step is perfect and the pictures are making me hungry! I havnt seen a pasta maker in action since I was little. Thanks for the great ideas, I will be borrowing this for this years harvest!