We enjoy baking all of our own bread products at Curbstone Valley. As much as we love our sourdough bread, it does take planning a day in advance, and forethought, to craft a loaf of sourdough. Some days I suddenly realize we’ve run out of bread, but don’t have an entire day to devote to baking. This is where using a direct-dough bread recipe works perfectly.
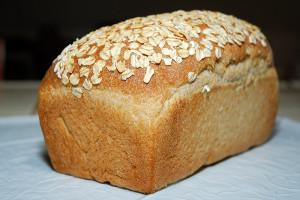
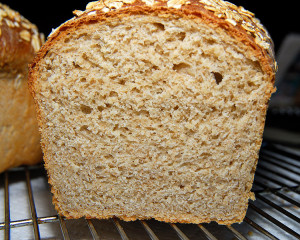
The wonderful thing about this oatmeal bread is you can bake two steaming hot loaves, from start to finish, in time for lunch! It’s lighter than a 100% whole-wheat loaf, perfect for toast, but sturdy enough for sandwiches, and slices beautifully. As such we now bake this bread at least once a week, so that we always have some on hand.
Yield: Two 2 lb Loaves
Ingredients:
1 1/2 Cups (5.3 oz) Rolled Oats
2 1/4 Cups (18 fl oz) Water
5 1/2 Cups (1lb 8oz) High-gluten bread flour
2 1/3 Cups (10 oz) Whole-wheat flour
1/2 Cup (4 fl oz) Milk
3 Tbsp Honey
5 1/2 Tbsp Vegetable Oil
3 1/2 Tsp Table Salt
1 1/2 Tsp Instant Dry Yeast
Directions:
Lightly oil two standard metal 9″ x 5″ loaf pans.
Place the oatmeal in the bowl of a stand mixer, and add the water. Mix briefly and allow to stand for 10 minutes to wet all of the oats.
Add the flour, milk, honey, vegetable oil, salt and yeast, and mix on low speed until the dough begins to form a ball. Mix on the second speed for 3 minutes, and then rest the dough for 3-5 minutes.
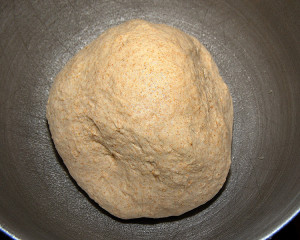
After resting the dough, mix for an additional 3 minutes. The dough should be slightly tacky, and the internal dough temperature approximately 75 degrees F.
Place the dough in a lightly oiled bowl (I use the mixing bowl, just mist with oil, and return the dough to the bowl). Mist the surface of the dough with oil, and cover loosely with plastic wrap or a damp dish towel, and allow to rise at room temperature for 2 hours. The dough should double in size.
Shaping:
To shape the dough, turn the dough out onto a cutting board or the counter, and divide in half using a serrated knife. Using a kitchen scale is helpful to ensure the halves are of similar weight.
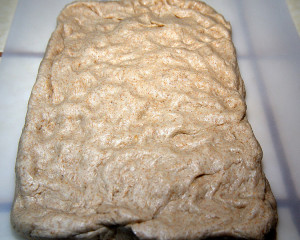
Each half is loosely shaped into a rectangle, approximately 5 inches wide by 9 inches long.
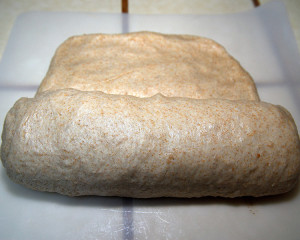
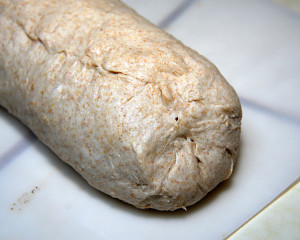
Starting at the short side of the dough, roll up the dough one complete turn and crimp the edges to increase the surface tension of the bread.
Repeat until a cylinder of dough remains. Do not taper the ends of the dough.
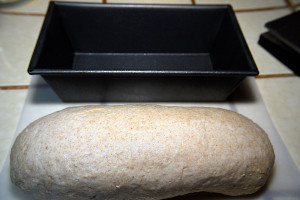
Pinch along the seam firmly to seal, and tuck the ends, pinching the seams for a finished look. (If you don’t tuck the ends, when the loaves bake, you’ll see swirls at the ends where the dough was rolled, and the decreased surface tension may result in voids in the bread during baking). The dough should now be approximately the same length as the pan as shown below.
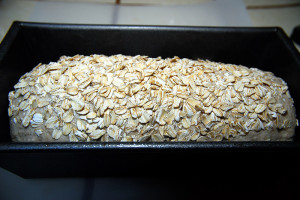
The dough will be placed in the pan seam side down. The top of the dough can be brushed with a little water, and pressed into additional oatmeal to decorate the top if desired, and then carefully placed into the loaf pans. If the dough is slightly too long, tuck the ends under as you place the dough in the pans.
Mist the top of the dough lightly with oil, and cover with plastic, or a damp towel to prevent the dough from crusting over. Proof the dough for 1 1/2 hours at room temperature.
Baking:
This bread is best baked with a brief injection of steam to enhance the crust, however, most of us don’t own steam-injected ovens. As an alternative place one rack in the center of the oven, and an empty metal lasagna, or half sheet pan (with sides) on the bottom rack.
Preheat the oven to 450 F.
While the oven is preheating bring 1 1/2 cups (12 fl oz) of water to a boil. Once the oven is heated, load the pans onto the middle rack, and immediately pour the water into the superheated pan on the bottom rack, and close the oven door. This helps to generate just enough steam for baking. You can bake the loaves without steam, but the crust will not be as crisp or as richly colored when it has finished baking.
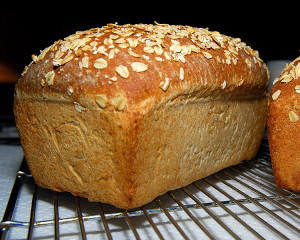
Bake for 15 minutes, rotate the loaves 180 degrees, and reduce the oven temperature to 400F. Bake an additional 15 minutes. Remove the bread from the pans and place the loaves directly on the oven rack for 5 additional minutes to brown the sides slightly.
Remove from the oven and cool on a baking rack for at least 30 minutes before slicing, and then enjoy!
This bread is best the day it is baked, but holds well when stored at room temperature in an airtight container for 3-4 days, or can be frozen for up to 3 months.




Beautiful bread! I will definitely make some this weekend!
Oooh, this sounds good. I have been in the kitchen a lot now that I am not working. Need to get back to my garden and work off some of the baking.
Since I moved out of NYC I have been attempting to cook a lot of my own food… I even used vegetables I grew last year. What a change for me at least. I’ve never ever baked bread, but I’m intrigued. Maybe I should try it. It doesn’t LOOK like something I could mess up.
This makes my mouth water. We enjoy oatmeal wheat bread, but we have never made our own. Thanks for the recipe!
Awesome! I’m sending this to my husband, the official baker in our household.
You are a marvel Clare! This is just a perfect loaf and post! Delicious!
What a perfectly presented recipe, and it sounds easy (at least the way you put it!) and delicious. How on earth do you find time to bake your own bread on top of everything else? I stand in awe.
Absolutely lovely loaves! And a great recipe as well. This one is now om my “need to bake soon” list! 😀
Oat, wheat flour, honey … how delightful, Clare! When the children were small, I made all my own bread, granola, etc. … nothing like the smell of fresh baked bread! Thank you for sharing … I just might 🙂
oooh, perfect timing! A snow storm is on it’s way and my toes are already cold. Therefore, baking sounds GREAT! Thanks very much. =)
Dear Clare, I can only imagine what a wonderful aroma your constantly freshly baked bread must give to your kitchen. Perfect!!
I can smell it, Clare, clear up here. Beautiful loaf and I know it tasted mighty fine. I hope the you escaped any snow today… not sure if you were to get hit with it or not, but our 1 inch or so has now melted. PS: thank you for the mention of the red-tailed on the post; after more research it seems you and Randy were correct. Interesting for me is that several years ago, a “birder” in northern CA identified him as a red-shouldered and all these years that is what I thought. 🙁 Thanks, Clare!
I’ve always been scared to make bread with yeast without a bread maker but you’ve make it look so easy and delicious I might even have a go…
That bread does look beautiful! I don’t believe I’ve baked bread sans bread machine since high school HomeEc class. Way too much work for me, though, since keeping this family in bread would take all day every day. However, I will have to try your recipe, with those lovely step-by-step directions. That’s right up my alley.
Oh I wish I had a piece of this right now. I am putting this recipe on my list to make. It looks perfect!
Clare, My mouth is watering and I’ve already had dinner! It looks beautiful and delicious. I miss baking bread and may be convinced to start it up again~gail
Mmmm. I used to bake bread every week myself, before you could get good bread in this country. Now I’m actually pretty happy with the selections — they have an amazing Danish rye bread at the farmer’s market. But even just the smell of fresh bread is so inviting!
Thanks for sharing this recipe, Clare. I love baking, and this looks like a tried and true recipe! My husband absolutely loves home-baked breads, so this is something I definitely have to try.
Very handy recipe, sounds wonderful for peanut butter and honey sandwich. Since I have lots of oatmeal right now, I’m trying this recipe this week.
I hadn’t heard the tip about a pan of water in the oven, but had heard that french bread is sprayed with water during the baking. Nice tip!
Thanks!