Last week we installed a system of misters over the propagation bench for seedling germination.

Last week's project was installing misters over the propagation bench
Most of the vegetable starts will be transferred directly from the propagation bench, to the garden, so most of our seedlings won’t need anything more elaborate in the way of a watering system.

Vegetable seedlings like these beets don't spend long in the greenhouse
However, many native plant seedlings, woody perennial plants, and grafted fruit trees, will be held in the greenhouse until the plants are substantially larger, potentially for a number of months at a time.

Newly grafted fruit trees may spend a year or more in the greenhouse
We also occasionally dig up plants in the gardens to relocate them, or acquire plants at native plant sales, that may not immediately find their way to a permanent location in the garden.

This young Ceanothus 'Dark Star' may spend a number of months in the greenhouse before being planted out
As such, a number of these larger container plants will need a reliable source of water during their stay in the greenhouse.
The challenge with watering container plants in the greenhouse though is that irrigation systems can quickly transform into a tangled mess of tubing, and it can be challenging to design a system that is flexible, efficient, and can accommodate enough plants at once.
To help keep the watering system for the potting bench organized, and as tangle-free as possible, we’ve elected to go with a type of irrigation system more commonly seen in commercial nursery greenhouses.
As with the mister installation, for the transplant bench we used one-half inch irrigation line, which we’ve attached to a piece of rigid PVC to help keep it flat to the bench top.
At the water inlet, again because we irrigate with well water, we’ve installed a screen filter to minimize particulate accumulation in the emitters. This is the same setup we used for the greenhouse misters.

The system starts with the pressure regulator, and a screen mesh filter
This particular system uses an over-sized pressure compensating dripper head that is installed directly into the half-inch water line.

The tapered red end is inserted into a hole punched into the 1/2" main water line tubing
The manufacturer also offers a flexible cap that can be installed to cap off each emitter if not in use.

The emitter cap slips around the base of the emitter as it's installed
It’s easier to install the caps at the time the emitters are seated in the tubing.

The cap is held in position on the emitter during installation
Even though we’re also installing shut-off valves in this drip line, we’re not sure yet how our greenhouse may evolve over time, so we opted to install these caps so they’re there if we need them in the future.

Installed emitter with cap
Once the central emitter and cap are installed, the dripper assembly can then be snapped onto the emitter.
For this system we’re using multi-outlet dripper assemblies. There are two types of assembly for this system, and which one you use depends on how many individual drippers you want to supply from an emitter. Each emitter can supply up to sixteen dripper stakes (in multiples of four stakes per assembly). We determined that eight 1 gallon containers per emitter should suffice for this application.
The first dripper assembly supplies water to four dripper lines.

This assembly has four separate dripper lines, and the center is open to supply water to a second assembly above
The center of the assembly is open at the top to supply water to additional dripper assemblies installed above it.

The second assembly adds four more drippers, but is sealed at the top.
The stacking nature of these dripper units helps to prevent a tangle of tubing across the bench top, keeping the lines tidy, and together in one place, and this is what attracted us to this system in the first place. If lots of smaller containers need water, we can install additional assemblies on each emitter to expand the system. If just a few large plants need irrigation, we can remove the bottom assembly, and just use four drippers on the emitter. Each stack can be easily installed or removed as needed throughout the season.

This system should be able to shrink and grow through the season depending on how many plants need water
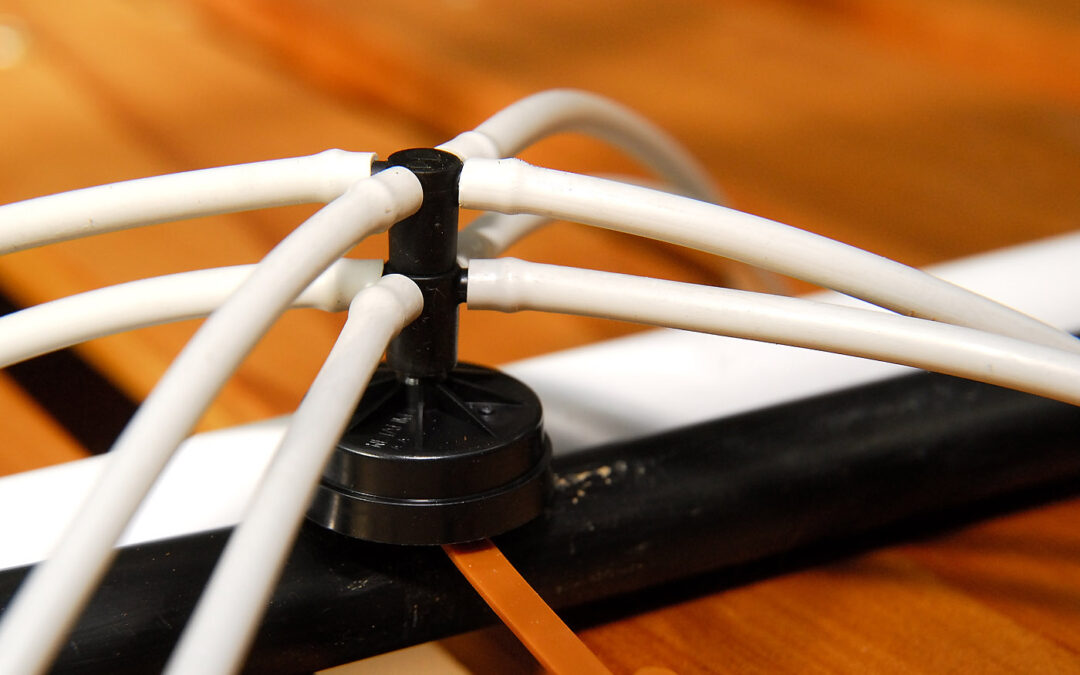
In between each emitter/dripper unit we installed half-inch shut-off valves (which we’ve now also added to the mister setup installed last week).

The black water line is simply cut anywhere a shut-off valve is needed

The ends of the valve are then pushed into the line and secured
This gives us a tremendous amount of flexibility during the season. We can turn mister or dripper assemblies off during the year that aren’t being used, which will keep the bench tops drier, and prevent wasting water. The valves may seem redundant as we also installed the emitter caps, but the shut-off valves stop water flowing to ALL the dripper assemblies downstream of the valve. However, if we need to restrict water only to emitters in the middle of the water line, we can cap those off, and still preserve flow to the drippers at the end of the run. This should minimize the need to modify the system later.

Turning the control perpendicular to the water line shuts off all water to any drippers below that valve
At the moment, any dripper units that are shut-off simply hang down below the slats in greenhouse bench to minimize clutter.

Dripper lines not in use hang below the bench, keeping the bench-top relatively uncluttered
As we’ve installed these units in a single straight run, if we need the bench space, and have no plants being watered on the transplant bench, we can simply slide the entire watering assembly to the back of the bench out of the way.
To supply water to individual containers, each white dripper line terminates at a rigid built-in dripper stake.

The dripper stakes are built in to each piece of 1/4" tubing
The water emerges through holes in the stake and simply runs down into the root zone.

Water flows down each stake into the pot
Multiple stakes can be used in large containers as needed.

These plants are waiting to be transplanted outside
This new system should not only us save time, and water, but also help to ensure the plants get the water they need, where they need it, without being over or under-watered.

This buckwheat is currently blooming in the greenhouse, and is not fond of getting its leaves wet
It also keeps the water off the leaves of more sensitive plants like this Rosy Buckwheat (Eriogonum grande var. rubescens).

The dripper lines are all clustered down the center of the bench, leaving plenty of room for plants
With both the mister and dripper systems now installed in the greenhouse, we can finally start germinating some of our favorite native plant seeds we’ve collected from around the property. I suspect we’ll be spending lots of time in the greenhouse this winter!


This is such a professional installation and very well thought out. I can bet you will be spending much time in the greenhouse, but a little less on watering chores.
That’s the plan. I’d like to focus more on seed starting and grafting in the greenhouse, and a little less on hose-wrestling! 😛
Wow this is very instructive! I’m not sure I could deal with the spaghetti tubing, though you’ve tamed it admirably. I showed part 1 to my better half and he was encouraged. I’ll forward this post to him too. He’s officially The Irrigation Guy, but he hasn’t really started yet. Hope he will soon or I’ll become the Irritation Gal! Though I do like visiting my seedlings while I hand mist, to be sure.
Taming the tubing is definitely key. Although, even with the propagation and potting benches set up with their respective irrigation systems, we still have the back bench to work on completely unencumbered. I’m hoping that by making these systems both flexible, and portable, that we’ll find them to be much more useful than intrusive. Once we run the main waterlines up to the greenhouse though, I think the most important part will be having each on its own irrigation control valve (and timer circuit). Clearly the misters won’t need to run as much as the drippers. Overall, I’m just looking forward to freeing up some time for the thousand other chores that need to be done around here 😉
This is impressive. You sure do seem to get a lot of projects started and finished promptly over there, on such a grand scale.
Haha! It’s all an illusion…you haven’t seen the list of pending projects that are still waiting to be done 😛
I always learn so much when I visit! If only I could have 10% of your productivity! Have a sweet weekend. gail
Thanks Gail. Actually, I think at the moment I’m rather slacking! So much more to get done before spring!
I really like the idea of being able to move the irrigation back against the frame to give more bench space.
As for Pinterest – your new project Clare is just perfect for a board.
I’m definitely going to look into Pinterest.
Moving the whole assembly back out of the way I’m hoping will be very useful when we start grafting tomatoes in the spring. I have a feeling I’m going to need a lot of elbow room for that project! 😯
Clare I feel like I could even do this with your incredible step-by-step instructions and pictures. What a wonderful place to spend winter…
These systems, once you’re familiar with all the pieces and parts, really are remarkably simple to install. The difficult part is figuring out what your project needs are, and sketching out which components you need for the system you’ve designed. Putting it all together is easy after that!
A place where plants can wait until you have a spot in the garden for them and they are water automatically, sounds like a dream to me. Your greenhouse is coming along so well, it will be filled with plants in no time.
It’s a dream for me too. I actually lost a couple of plants I was holding in pots outside this summer. It only takes one day of unexpected heat and sun to fry a potted plant to a crisp 🙁 This way my plants can be held in the greenhouse, and not die of thirst while they’re waiting to planted.
Looks great! You have put a lot of thought into this and it looks like it will be very efficient and a huge time saver! Well done!
Time savings was the biggest motivation to get this done. With only two of us we always seem to be behind on chores here. This has the potential to free up a lot of time over the course of a week, and hopefully will result in healthier and happier plants too! 🙂