As we mentioned in our Newbees post, we’re gearing up for our first honey bees this spring. Before the bees arrive however, we need to ensure we have a place to put them!
Although there are a few different styles of hives available to today’s beekeepers, we opted to use the most common hive type available, the Langstroth hive. Availability of hive components was our primary reason for choosing the Langstroth hive, as we still have numerous other projects to complete on the farm in the next couple of years, and building our own hives from scratch, at the moment at least, would be a significant diversion.
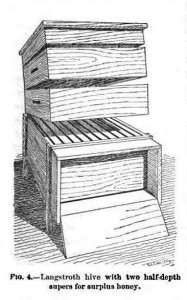
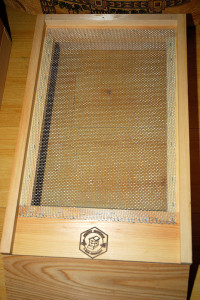
The typical Langstroth hive is composed of a hive stand, a bottom board, a series of boxes, called hive bodies, that contain the hanging frames where the bees build their comb, and a roof.
The traditional Langstroth hive bodies come in three different standard sizes:
A “Deep” hive body: also known as the brood chamber, houses the tallest frames, where the Queen typically lays her eggs.
“Medium” hive bodies: placed on top of the brood chamber, may contain a combination of brood and honey.
“Shallow” hive bodies: also known as honey supers. The queen is usually excluded from this part of the hive, to prevent her from laying eggs in the shallow supers, which contain the honey stores, relished by bees and beekeepers alike.
Not all beekeepers use all sizes of Langstroth hive bodies, and there may be various combinations of different sized hive bodies that comprise any individual hive.
The standard Langstroth hive set-up can be quite complex and may require storing up to 3 different sizes of hive bodies, and 3 different sizes of frames. As we have no desire make beekeeping more complicated than necessary, nor a desire to build a dedicated bee-keeping storage shed, we’ve opted to keep our hive setup simple.
The All-Medium Langstroth
After doing our homework, and consulting with other area beekeepers, we’ve decided that we’d prefer to start out with a modified Langstroth hive system. Our hives will consist purely of medium hive bodies, no deeps, and no shallows, just mediums. The principle advantage of an all medium hive system is that we’ll only need to store one size of hive body, and any hive body can be placed anywhere on any hive. One year a hive body may house brood, the next year it may house honey.
Many commercial bee-keepers use single sized hive body systems to simplify bee management too. Some use all deeps, some use all mediums. All deep hive body systems need less total boxes per hive, but each individual hive body, full of bees, brood, and honey, is heavier than an individual medium hive body.
In addition to keeping the hive bodies all one size, we’ll also only need to purchase, maintain, and store one size of frame for the hive bodies too.
8-Frame Hives
The standard Langstroth hive setup places 10 frames, that the bees drawn their comb on, within each hive body. Some beekeepers for ease of maintenance will remove one frame, reducing it to 9 frames and spacing them evenly within a 10-frame box. However, recently smaller 8-frame hives and equipment have become more readily available. We’ve chosen to use 8-frame hives as this will help to reduce the weight of our hive bodies even further, as the 8-frame hive bodies are dimensionally smaller than 10-frame boxes.
As our hives will be situated on a slope above the vegetable garden, we’d like to keep the weight of the hive bodies down. I’ve already taken a few spills down our slopes, and even managed to give myself a black eye on one occasion when I cracked my head on a shovel at the bottom of the hill. I was empty handed during that fall, so trudging down a hill with a 90 lb box of comb and honey just seems like it might give gravity an unfair advantage. Hopefully the slightly smaller configuration will help to keep things more manageable, and prevent any additional black eyes.
When shopping for our hive components we were advised not to purchase pre-assembled hive bodies, as they typically are only nailed together, not glued and nailed, and thus the joints have a tendency to separate at the corners, especially in our damp coastal climate.
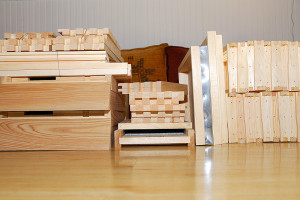
Heeding that advice, we purchased unassembled hive bodies and spent last weekend putting them together. As we’re using all medium hive bodies, we’ll be using two medium hive bodies in place of a single deep for the brood chamber, and expect to need a minimum of three hive bodies per hive through the first summer, potentially four if there’s a good nectar flow and our colonies do well. To be sure we’re prepared though, we’ve obtained five hive bodies for each hive, as it never hurts to have an extra or two around.
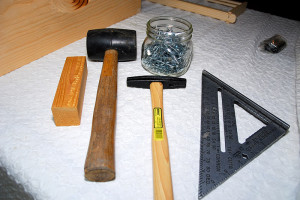
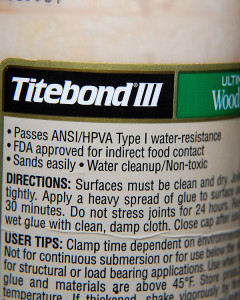
Assembling the hive bodies was very straightforward. A tack hammer, rubber mallet and 7d hive body nails is all we needed, in addition to a quality waterproof wood-glue. Titebond II & III wood glues are both approved for indirect food contact, and are recommended for hive body construction. We used Titebond III as it’s what we had on hand. It has a slightly longer open time than Titebond II, but seemed to work just fine.
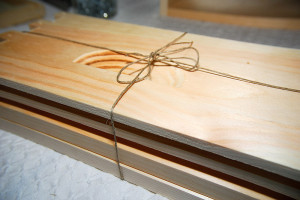
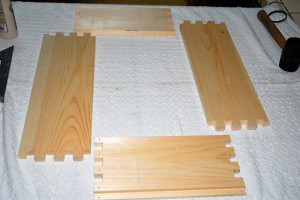
Each body panel was pre-cut and pre-drilled, so we started out by laying out the panels, being sure to orient the tops and bottoms the right way up.
For each body panel the surfaces that would butt together were all glued, as shown below. We glued the contact surfaces, NOT the exposed ends (marked with the red ‘x’).
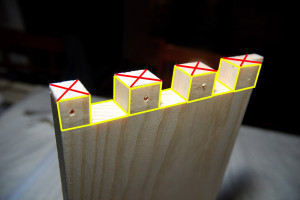
The inside of the joints should be all glued (outlined in yellow), but not the exposed ends which will be visible once the box is assembled
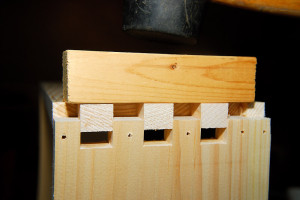
To assemble the corner joints, a wood block and rubber mallet was used to prevent marring of the wood surfaces. The joints were a snug fit, and it took a fair amount of force to bring the joints together.
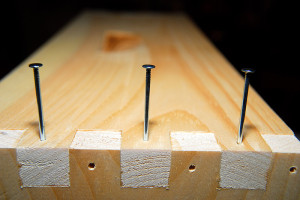
Once the corner joints were glued and assembled, 7d hive body nails were inserted into each of the pre-drilled holes, and seated using a tack-hammer.
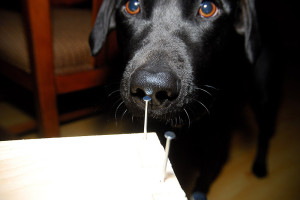
Of course this step was done under strict supervision to ensure we did it right…
A total of 32 nails, and a few dog-licks later, the box was finally complete, and ready to set on the hive stand…only 9 more boxes to go.
We still have a few hive bodies to put together, and the frames aren’t all assembled yet. The frames typically are fitted with wax foundation, or starter strips, on which the bees will build out their comb. We’ll get more into frames and foundation versus foundationless systems in a later post.
With the boxes complete the hives really started to come together. The top hive body is usually fitted with either a solid or screened inner cover, which sits over the frames, and directly underneath the lid.
Now we just need the rain to stop, so we can prime and paint our hives!
The half-pint hive to the right in the photo above is our medium nuc. Nucs are essentially temporary bee hives, used for housing bees short-term. Again, keeping things simple, the nuc takes the same size frames as our hive bodies, and we’ll use the nuc as a bait hive to capture feral swarms, or for splitting (dividing) healthy colonies later in the season. This weekend we’ll wrap up the last of our hive construction, and weather permitting, hope to start clearing the area where our hives will be placed in the garden!

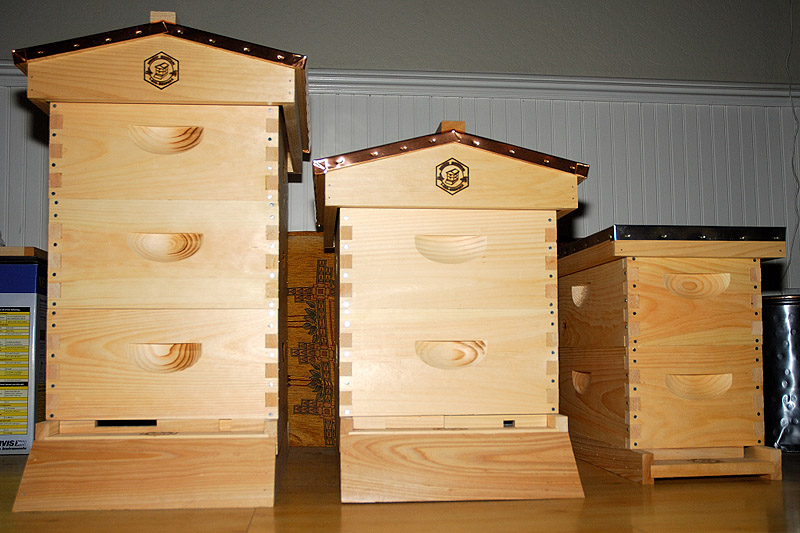
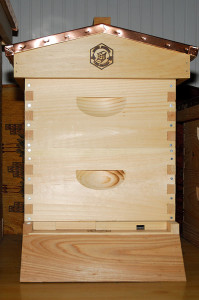
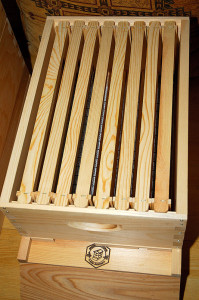
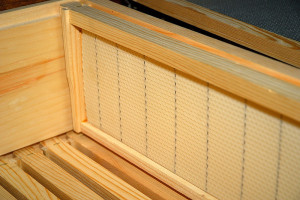
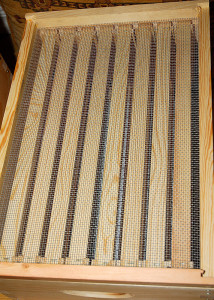
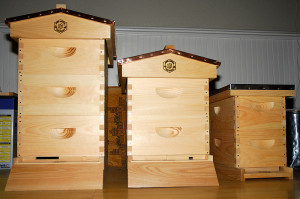




Lookin’ good! We have the 10 frame bodies with 8 frames and two follower boards. Apparently the follower boards help with condensation in the hives in the winter.
I’ve heard the follower boards can help a lot. A pro beekeeper that gave a lecture at one of our guild meetings uses them, even in 8-frame hives in the winter. He feels the bees tend not to build out to the outside frames that much anyway. Moisture here is definitely a concern in the winter months.
I just love building stuff. This looks like a fun project all the way from the very beginning until the end when you are harvesting honey. The photo of your lab is so lab-like. I had a black lab and he was always involved in everything. He was also my chicken hunting dog too. I guess your lab does not partake. Mine used to visit farms and come home with his prize catch. A little buckshot on occasion too.
Our lab is definitely nosy! A couple of times she almost got clonked in the nose with the tack hammer because she was so curious about what we doing with the boxes. She’s got some real chicken-killer instincts too, so she doesn’t get to meet the chickens, unless there’s an electric fence between her and the poultry! Our other dog is great, and hangs out with the hens when they’re on range, but this one is trouble with a capital T!
Ooh, I’m looking forward to following your beekeeping exploits. Do you know what colors you’re going to paint your hives? I posted pics of my friend’s hives (with fun links): http://natureid.blogspot.com/2010/07/cordovan-italian-honey-bees-apis.html
I actually haven’t picked a color yet. I suppose I should be a little creative 😉 I think I found that same website last week with the gloriously colored hives…I remember the Bavarian looking one, and thought it was fantastic! I’m not quite that artistic, but I’m sure I can manage a little splash of color!
Having one size hive bodies and frames would definitely simplify things. I used deep bodies for the brood chamber, and shallow ones for the honey. But our winters are harsher than yours, and the deeper bodies allow for more honey storage to get the bees through the winter. Or at least that was the wisdom at the time.
The reduced weight of your setup should be a big plus too. I remember that even my shallow 10 frame super was pretty heavy when filled with honey.
I am really looking forward to hearing of your progress with the beezz this year!
I’m sure that’s still the conventional wisdom with deeps in cold climates. I don’t know that I’d go to small 8-frame equipment in an area with deep freezes, unless I had a way to protect the hives in the cold weather. I remember being shocked the first time I heard how heavy a honey super could get. It’s enough of a workout wrestling a sack of poultry feed, so I’m hoping my biceps won’t look like Popeye’s with the smaller hive configuration, but I’m sure it will still be heavy enough! 😉
Dear CVF, Ooh, how exciting! And you are already very knowledgeable. I can’t wait for the arrival of your first bees … I bet you are excited, too. P x
I do feel like we’ve learned a lot in the last 6 months about bees, but we have soooo much more to learn, and some of that will only come from experience. It is exciting though, and I can’t wait to get the hives in the garden…and fill them with bees! 😀
Clare, I always learn something interesting from your posts. I’ve long been aware of terms like “frame” and “hive body” and “honey super” but I had only the vaguest idea of what they meant. Thanks for the educational guided tour through the parts of a bee hive.
You’re welcome Jean. I wanted to keep it simple, because when we were first learning about bees and beekeeping, the initial hurdle was understanding the terms associated with it. I think most beekeepers take their lexicon for granted, and forget what it’s like to muddle through from the ground up when you’re learning about this wonderful hobby for the first time 🙂
Clare, you’ve put a great amount of detail in these posts. Thanks for giving us the tutorial. I’ve long been interested in bees but I know very little about keeping them so this has been very interesting. I wonder, does the glue and paint, etc on the hives affect the bees or the honey at all? I’m always concerned when using wood with vegetables as so much is pre-treated.
No, the bees and the honey are fine. Most commercially available hives are built of untreated pine or cypress. It is very important to be wary of treated woods that come into contact with food, and especially so if you’re building your own hives. For the bees, the hives are untreated pine. The glue we used is specifically approved for ‘indirect food contact’, and we’re careful to keep it just in the joints of the boxes, and to mop up any excess. The frames aren’t glued at all, just nailed. For painting the hives, you never want to paint the interior where the bees live and store honey. Only the exterior of the hive parts that are exposed to the weather. We’ll use a low VOC semi-gloss exterior paint, and be sure the paint is dried and cured before introducing bees. The bees usually seal the inside of the hives themselves where necessary with a substance called propolis, a resin-like material they gather from sap flows and buds…they have their own ideas about decorating the inside of hives 😉
They look great! I can’t wait to see how they look out in your orchard with the bees flying in and out. Are you going to wear a beekeeper suit?
Mr. Curbstone just has a bee jacket and veil, but I have a full suit, hat and veil. It’s most important to work bees wearing what you’re most comfortable in though. After a rather unpleasant experience on a trip to South America, where I found myself standing in the middle of a ground nesting wild bee hive in a cane forest, and being stung accordingly, I’d prefer to prevent being stung as much as possible. Mr. Curbstone is braver than me though…for now 😉 That said though, many beekeepers, even those who start out in full suits, eventually seem not to bother. Most hives are placid enough to be worked without a suit of armor, although some feral bees can apparently be little more aggressive. I’m just firmly, for now, in the wimp category 😛
You guys have the exact same set up that we do! The first time you lift a totally full 8-frame medium super, you’ll know you made the right choice. Those boxes are *heavy* and a 10-frame deep would be miserable to lift.
We painted a color that would look nice with fresh copper as well as patinated metal.
I didn’t realize you went 8-frame too! Weight was definitely a concern for me. I want working the hives to be enjoyable, not physical punishment 😉 Good point about the paint choice. I do like the nice fresh copper color, but I am excited to see it as it ages, and it will be good to have a paint that complements the roof regardless.
I am impressed by all the time and effort you are putting into this. I was hoping to get a local beekeeper to put some hives in our gardens in exchange for a little honey.
There are number of those operations popping up around here, and I think it’s a wonderful way to have bees in the garden, and help with pollination, without having to invest a lot of time and resources into maintenance, especially if you only have space for a single hive. A lot of small scale beekeepers are often looking for place to house hives temporarily too, and most beekeepers are more than happy to exchange a little honey in return for borrowing a place to put a hive.
Dear Clare, I am sure that for you style is not a prime concern, but to me, your hive looks tremendously stylish and would grace any garden [or, indeed, farm] that it would find itself in. As for assembling all those pieces together…..a nightmare for me who finds completing a jigsaw a full time occupation!
Actually, you’d be surprised. Although I shlump around here in coveralls and wellies most days, I am rather fussy about aesthetics in my environment. Function was the priority with the hive, for the bee’s sake, but I’m a big believer that things can be just as beautiful as they are functional, if you desire them to be so, and these hives fit the bill perfectly! 🙂
Gosh you’ve even had to consider gravity in choosing your hive types! As always, Clare, am so impressed with the professionalism of the CV keepers, whether it be Fowl or Bees. No one could go wrong following these instructions though it might be a challenge too far for me. Am excitedly awaiting the arrival of your industrious creatures and reading of their progress through the seasons.
Well, yes, gravity and I aren’t always on the best of terms, and gravity, more than once, has had the upper hand! It doesn’t help that our soils are very loose and sandy, so getting a good footing out in the garden in some areas in tricky. The slopes on our property do confound everything from coop placement to planting. It’s definitely different living here in the mountains, compared to living on flat ground!
I can’t wait to read more on this great adventure Clare 🙂 Your handiwork looks really good considering what some of my flatpack attempts have been.
That’s really exiting! I hope it all goes beautifully for you guys, bees are such wonderful creatures. You’ve really done your homework on the topic.
Looks like you’re going to be having a lot of bees! This is something I always wanted to try. Please do follow up posts so we can see how it all works out for you. I hope it works out well.
We’ll definitely post updates!
Clare,
Tomorrow is the last day of my beginner beekeeping class. I have a 1 in 8 chance of getting a free hive! I’ll be getting the 10 frame hive using the deep for brood and will have to purchase a honey super. Bees will be here around the first of May!
Great Randy! Sounds like your bees will arrive a couple of weeks after ours. Will be fun to compare notes as first year beekeepers, in two different climates. 🙂 Good luck, hope you win the hive. Hive equipment gets expensive, so every little bit helps!