With unpredictable summer weather the last couple of years, finally culminating in a dismal tomato harvest last year, after many plants failed to thrive, we decided to try grafting some of our favorite heirloom varieties onto more disease resistant rootstocks this season.
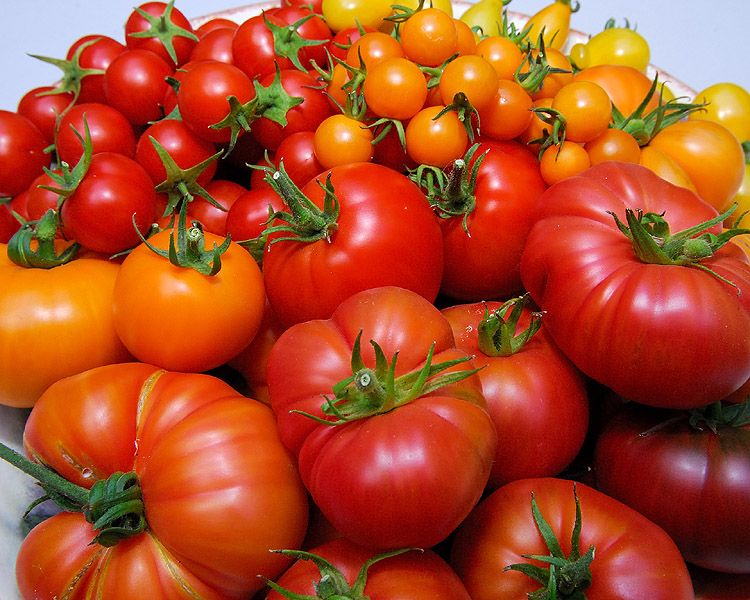
We grow primarily heirloom tomatoes, which are not as disease resistant as modern hybrid cultivars
Commercial growers often graft heirloom stock, to impart disease and pest resistance, as many heirloom varieties are not resistant to some of the more common tomato maladies, such as Fusarium Wilt, Verticulum Wilt, and Tomato-Tobacco Mosaic Virus.
We already graft apple trees to alternate rootstocks for the same reason, conferred disease resistance, so we thought we’d experiment with grafting for tomatoes.
Choosing Rootstocks
The first step for grafting was to determine which rootstock we should choose. There are numerous rootstocks available with varying levels of resistance to a number of common diseases, including Tomato Mosaic Virus, Corky Root, Fusarium Wilt, Verticulum Wilt, and Bacterial Wilt. [1] Knowing which diseases are present in your garden can help with rootstock selection.
Despite employing rotation techniques, we encountered Fusarium Wilt in the garden last year for the first time, so the rootstock needed to be at least moderately resistant to Fusarium, which is caused by Fusarium oxysporum.
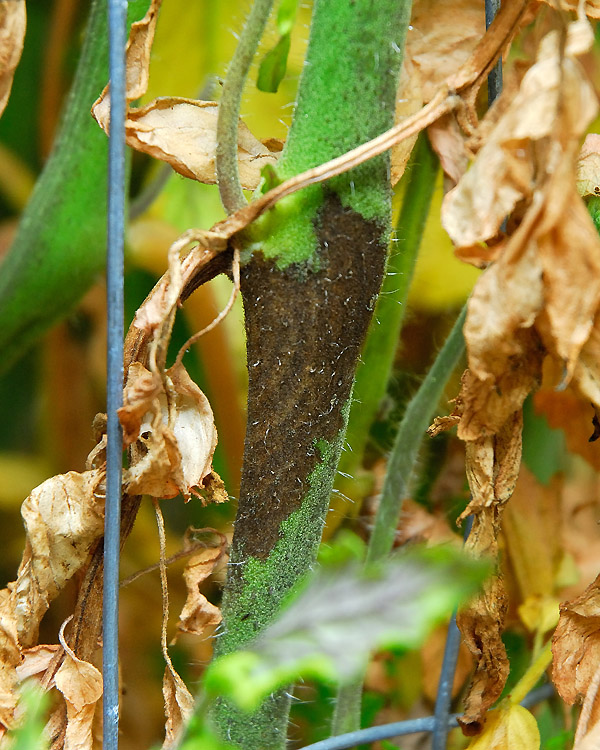
Fusarium wilt can decimate the tomato harvest by reducing plant vigor, and may even kill a plant before it has a chance to produce fruit
We selected the rootstock Maxifort (F1) this year, as it is a vigorous rootstock, with moderate to high resistance to Fusarium Wilt, and it was readily available from our seed supplier.
For grafting, we began by sowing both our heirloom tomato seeds, and the rootstock seeds at the same time.
Germination experiments may be necessary to match rootstock growth with the scion
However, we staggered seeding the rootstock seed over the period of a few days. This is because not all tomato varieties grow at the same rate. It’s important when grafting to ensure that the diameter of the rootstock stem, and the diameter of the scion (the heirloom variety being grafted) are the same. By staggering sowing dates for the rootstocks, we ensure we have a variety of stem widths to choose from at the time of grafting.
As we had not grafted tomatoes before we also were sure to plant more seeds than normal for each variety. Then we could afford a few ‘learning curve casualties’.
Although rootstocks sown from seed tend to have increased plant vigor, initial germination can be low, and may not be uniform. That was certainly true for us. The germination rate for the Maxifort seed we chose was stated by the supplier to be lower than their standard rate (they had included additonal seed to compensate for poor germination). At grafting time, we only had 50% germination, compared to 95% germination for our heirloom seed. As such, overseeding of rootstock seed, expensive though it is, is important to ensure there are enough rootstocks for the available scions.
Preparing to Graft
While the seeds were busy sprouting, we needed to create an area to place the plants as soon as they were grafted. Ideally the grafts need to be kept at least at 80-95% humidity while the plants heal, initially with no direct sunlight [2].
To achieve both, I constructed a simple humidity chamber out of sheet polyethylene, and PVC pipe.
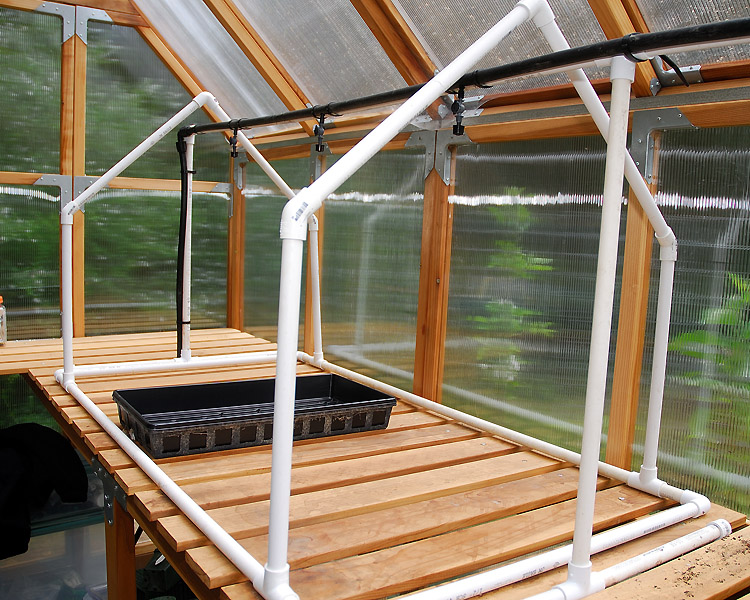
Using 1/2" PVC, a simple frame was built on the greenhouse bench top
It’s important that water doesn’t condense at the top of the humidity chamber and drip onto the scions during healing, as this can disturb or dislodge the new graft. To prevent this, a peak is constructed at the top, so any condensate will run down the wall of the chamber, rather than dripping on the plants.
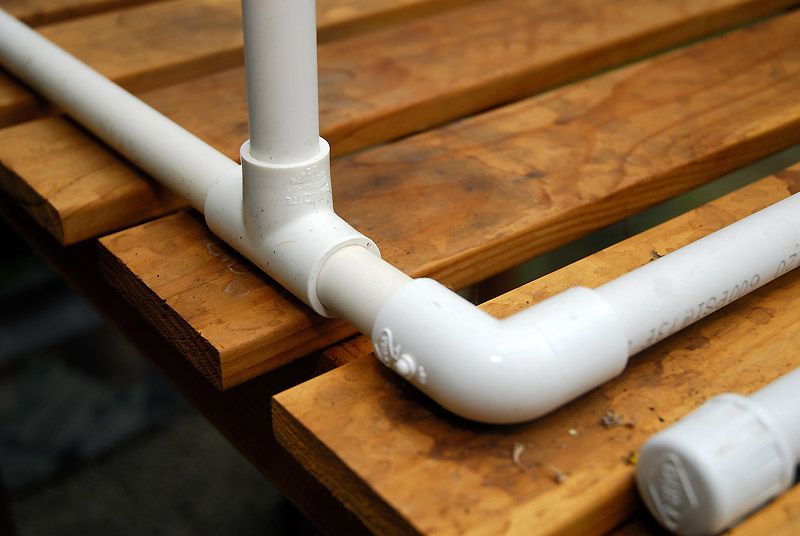
The frame was constructed of 1/2" PVC with six 90-degree elbows, four T-connectors, and four 45-degree angle connectors
I expect I’ll leave this frame up on the greenhouse bench year around now, as it actually could be used outside of grafting season to support shade cloth over tender seedlings. As it turned out, the peak of the chamber ended up above the level of the misters that run across the propagation bench. This wasn’t intentional, but it will allow us to run the misters over the shaded seedlings too.
The PVC frame was covered first in sheet polyethylene, then with a layer of shade cloth.
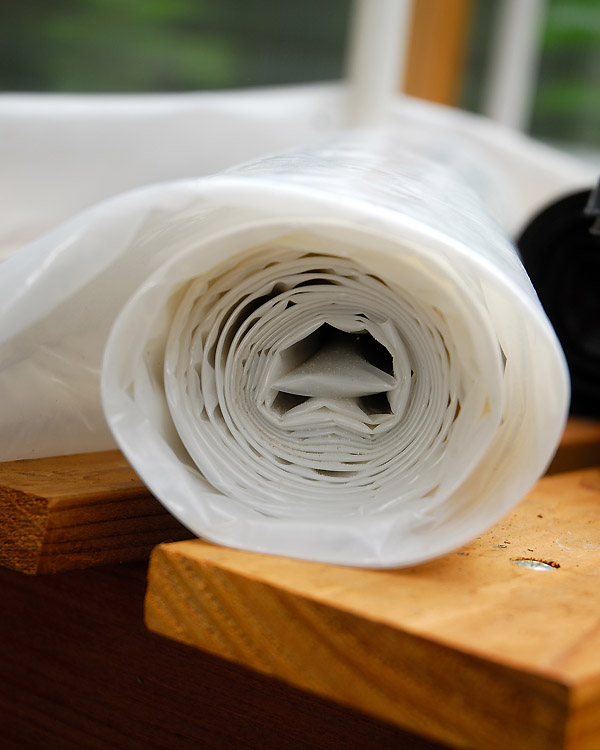
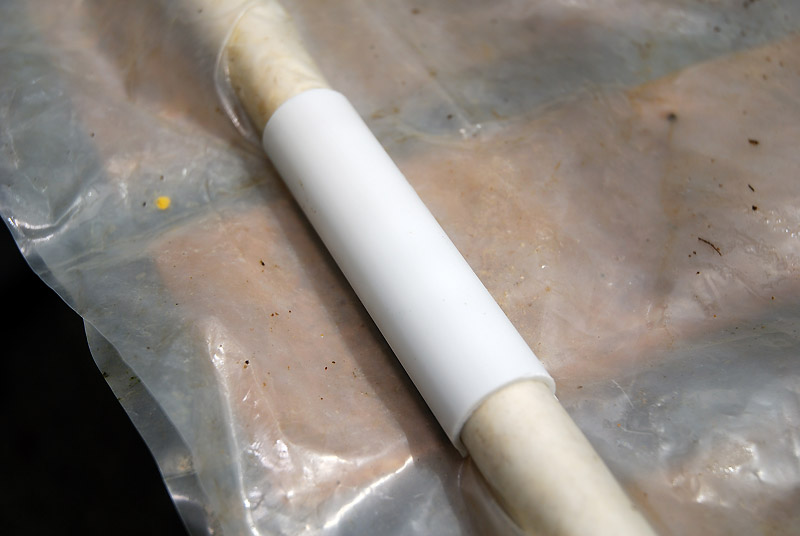
If you can't locate sheet polyethylene, try the painting aisle of the hardware store, next to the dropcloths
The polyethylene was secured to the frame using PVC snap clamps.
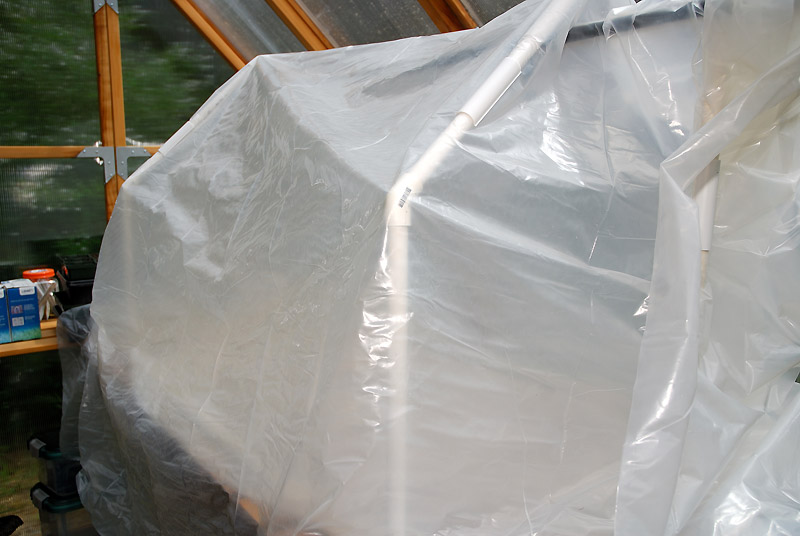
The clamps help to secure the sheeting to the frame, to prevent it from sliding off
It’s important to have good coverage, and to seal up the edges to prevent humidity from escaping.
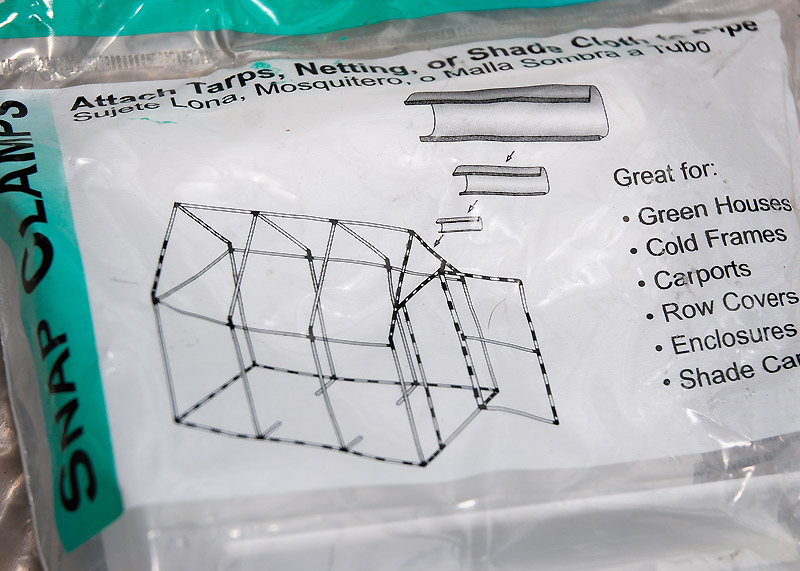
Around here, PVC snap clamps are almost as useful as duct tape!
Sometimes it’s the simplest inventions that prove the most useful. We use these snap clamps for a lot of projects here, whether it’s for anchoring netting over strawberries, or securing row covers over tender seedlings, or building a humidity chamber for tomato grafting, we always keep some on hand.
The floor of the chamber was also fitted with polyethylene sheeting, and clamped to the frame using PVC snap clamps.
The PVC pipe that runs around the bottom of the chamber creates a lip. With the polyethylene secured over the pipe, the floor can flooded as needed, and will hold water
By lining the floor (bench top) with plastic sheeting, this allows the floor of the chamber to be flooded, both for bottom watering, and to help increase humidity within the chamber.
Over the top of the shade cloth layer, to block light for the first few day while the graft heals, we also installed a layer of light blocking plastic (in this case a couple of 33 gallon garbage bags taped together).
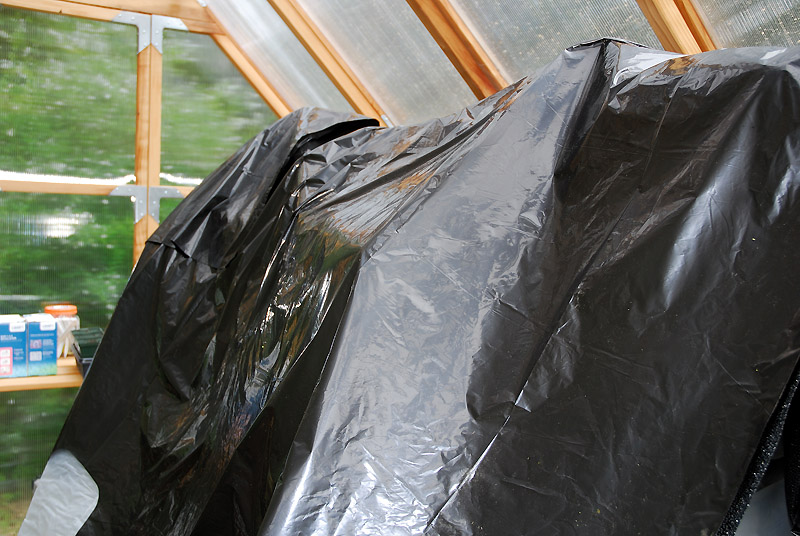
We spared no expense with the light-blocking plastic layer
The idea is that when the black plastic is removed, the shade cloth layer will permit some light to enter, but not at full intensity while the plants slowly acclimate to the greenhouse environment.
Preparing the Grafting Area
On grafting day, I waited until late afternoon, as the temperatures were cooling, to graft the rootstock and scions together. It’s imperative not to allow the grafts to dessicate while working. Avoiding direct sunlight, and drafts, will prevent the cut ends of the grafts from drying out before the grafting process is complete.
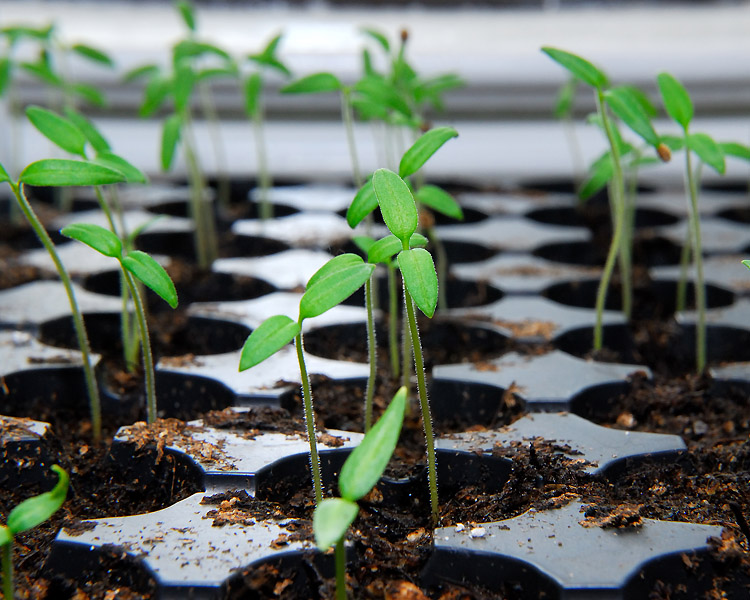
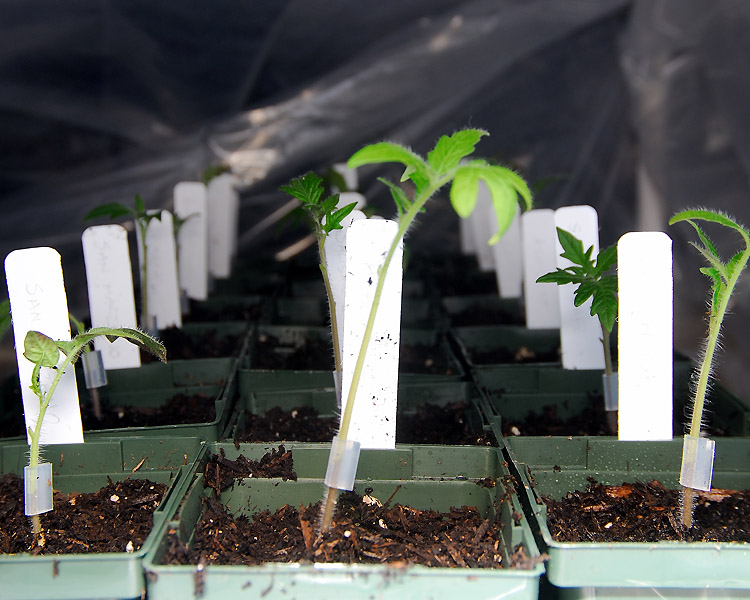
Before grafting, the plants should have attained the second ‘true leaf’ stage.
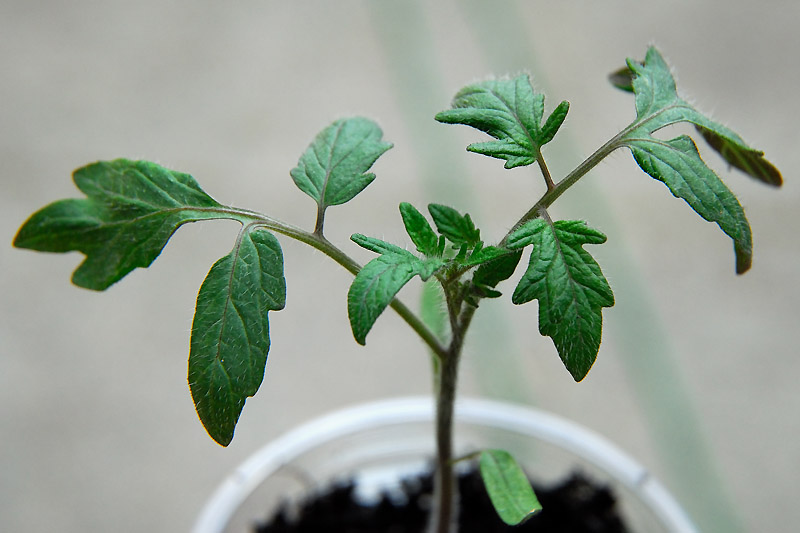
You can just see the second set of true leaves emerging in the center of this plant...it's grafting time!
With exception of the grafting clips, the tools required for grafting were quite simple and straightforward:
- A cutting board
- Rubbing Alcohol
- Paper Towels
- Double-edged Razor Blades
- 2.0 mm Japanese Tube-Grafting Clips
- Exam Gloves (optional)
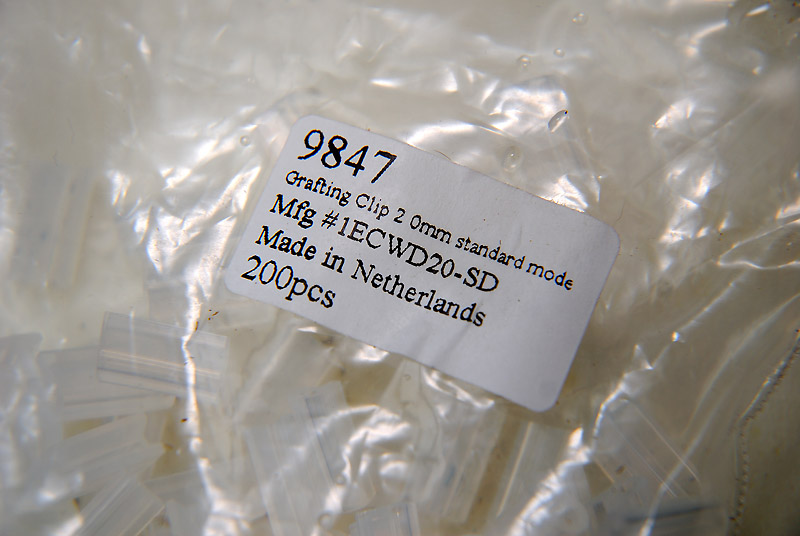
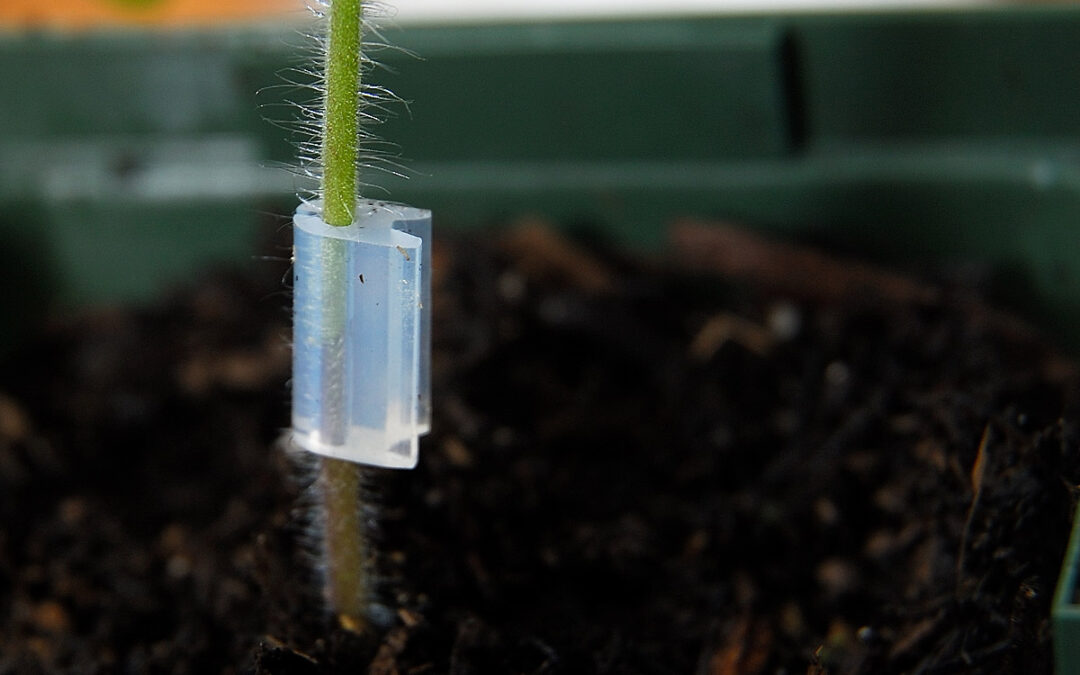
There are various styles of grafting clips available. We chose to use 2.0mm tube grafting clips
To test whether or not the plants are large enough to graft, a grafting clip was first slipped around the stem of a few plants to ensure the clip was snug, and did not slide downward. If the clip slips, try again in a day or two.
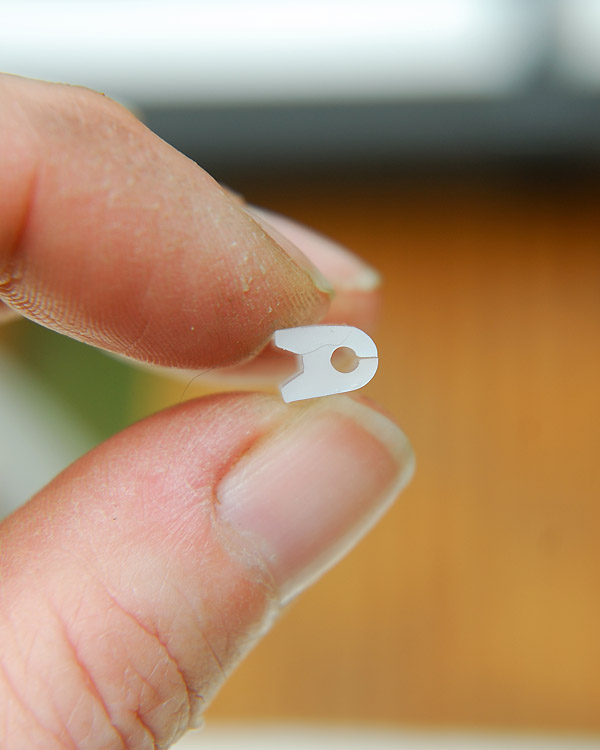
This is a tube-grafting clip. The stem should fit securely inside the clip, and clip should not slide off
The sides of the clip are pinched together to open, and released to close
During grafting it’s important to keep the work area free of debris, as any dirt on the cut edges of either the rootstock or the scion can inhibit graft healing. The cutting board, and razor blades, are kept clean throughout the grafting process with rubbing alcohol.

Isopropyl alcohol is cheap, and an effective disinfectant for keeping the work area clean
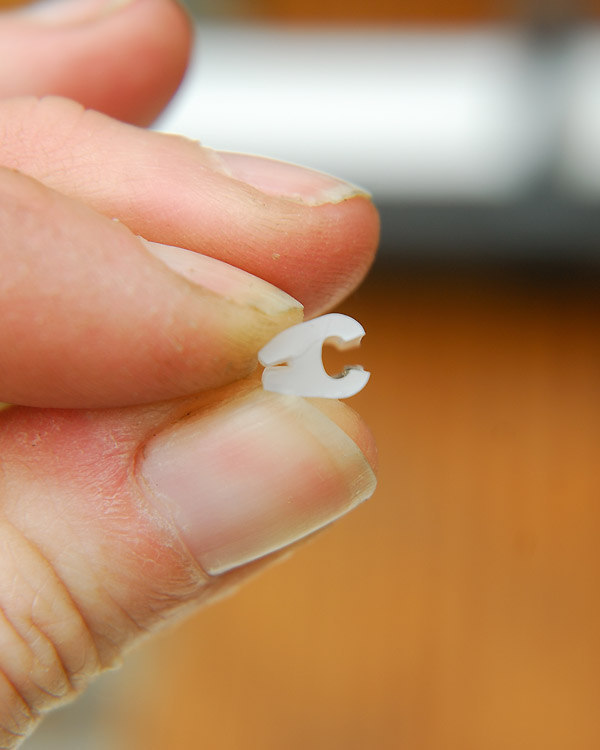
To avoid unnecessary bandaging of fingers, the double-edged razor blade was first snapped in half.
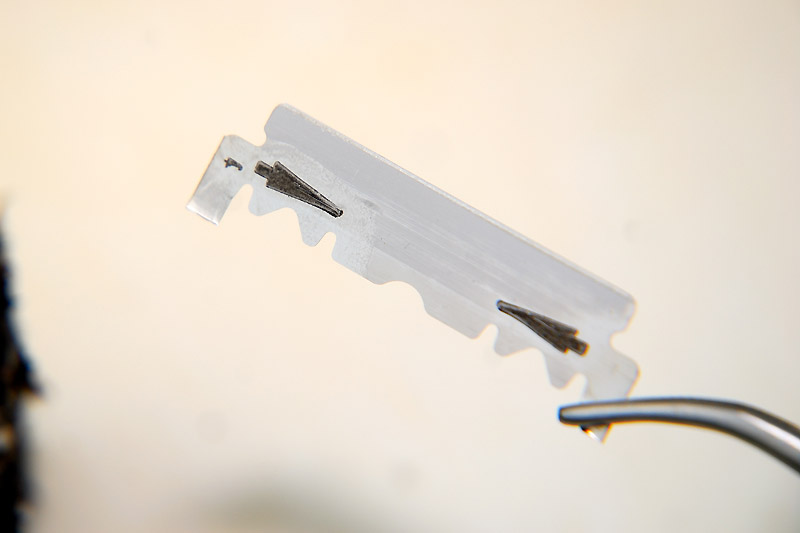
Snapping the razor blade in half makes it safer to handle while making the grafting cuts
The single sided blades with the thick metal bands at the top are not recommended for grafting, as these single sided blades are too thick.
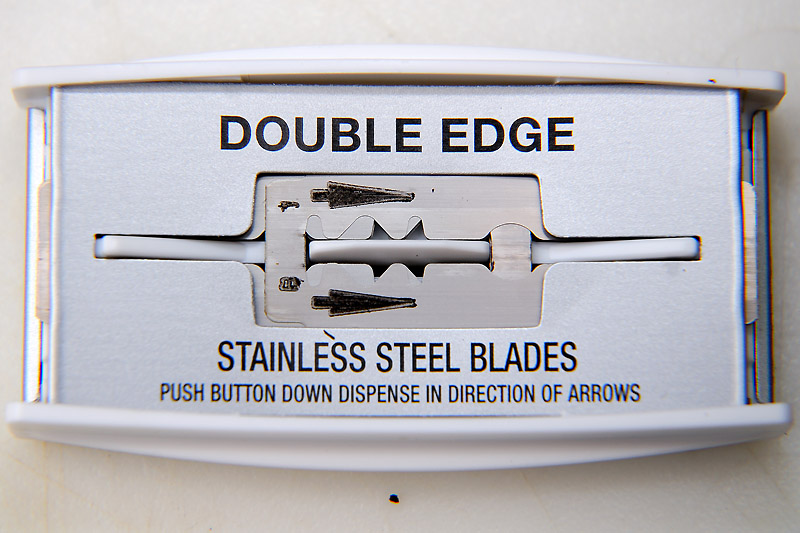
Double edge razor blades are thinner, and sharper, than some other blade types, and prevent crushing of the stems while cutting
Grafting Process
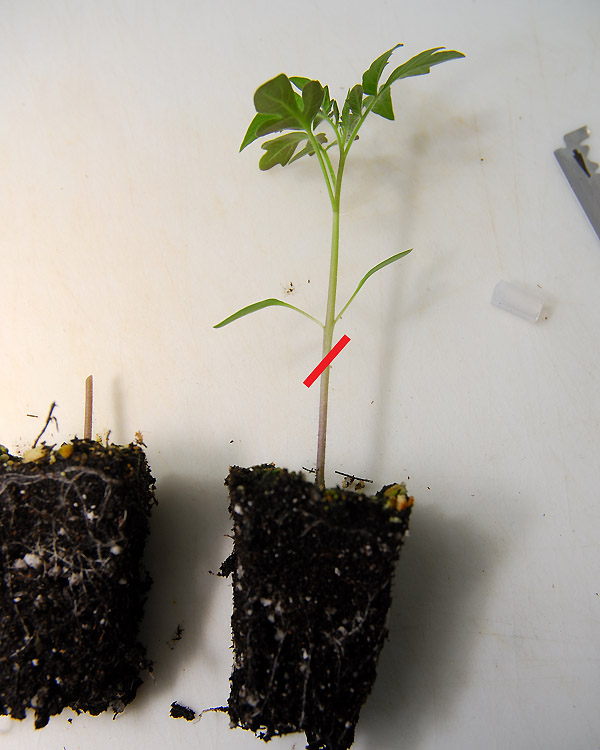
First, the rootstock was cut below the cotyledons.

A 45 degree angle cut is made across the stem of this Maxifort seedling, below the level of the cotyledons
This is to prevent adventitious rootstock shoots from emerging along the stem. I’ve read everything from a 30-45 degree angle for the cut. It’s more important to be consistent with the angle of the cut from rootstock to scion, than it is the exact angle of the cut itself. If it helps, a 45 degree angle line can be drawn on a paper towel, and positioned under the plants to guide the cut.
The scion stock is cut at the same angle as the rootstock, adjusting up or down the stem so that the thickness of the stem matches the rootstock.
The scion seedling is cut to match the angle of the cut on the rootstock
With the rootstock, and scion cut, you should be left with this.
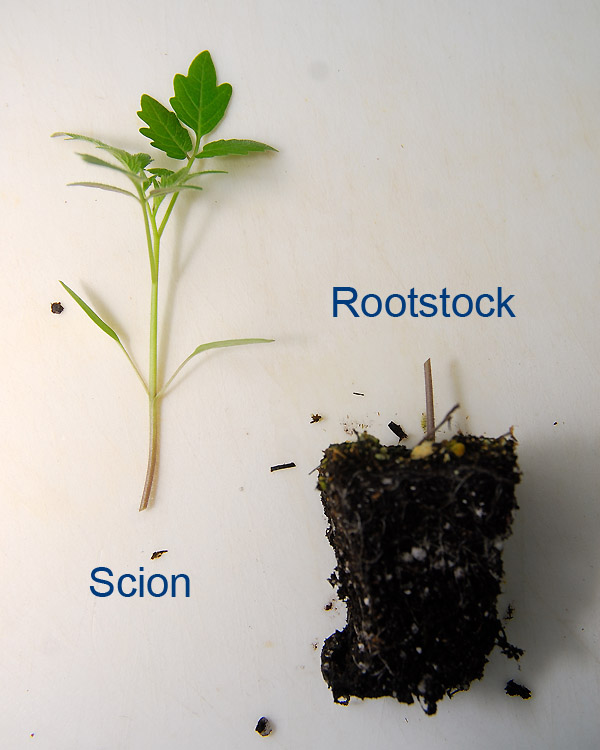
The scion (left) is the heirloom variety we want to grow, and the rootstock (right) is the disease resistant Maxifort seedling
Before completing the graft, the side leaves are then trimmed from the scion stock so the plant has less to support during healing, ideally leaving only the central growing meristem.

The cotyledons, and side leaves are removed to reduce water loss while the graft heals
A tube grafting clip was pinched open, and stretched over the rootstock stem, and the scion stem slipped down into the clip, matching the angle to the rootstock, and seated securely before releasing the clip. The grafted plants were then potted into 4″ pots, and immediately set into the humidity chamber.
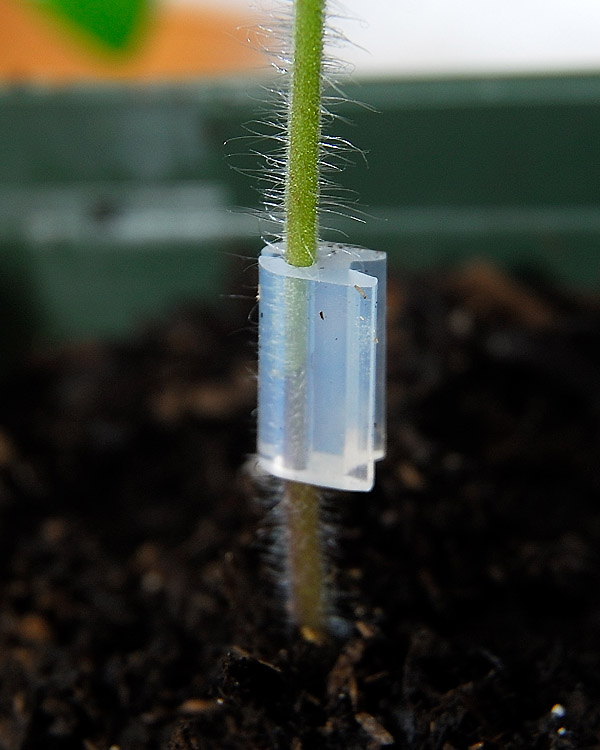
The grafting clip will secure the graft union while the plant heals. As the stem grows, the clip will fall off
The grafts will remain in the humidity chamber through the first week. A few of the grafts have wilted slightly since we grafted, and it looks like we may have lost 2 out of 20 grafts thus far, which is not unusual. Losses are to be expected, and we may have a few more losses before transplant time. We will slowly increase the amount of light entering the enclosure where the grafts are housed, and decrease the humidity, until the plants have acclimated to the greenhouse. This part of the process can’t be rushed, and if the plants begin to wilt further, we’ll close the chamber back up, and try again the next day.
Grafted tomatoes inside the humidity chamber
Once the graft unions are completely healed, and the plants have hardened off, we can transplant them to the garden.
Grafting tomatoes increases both the cost of production, as rootstock seed is expensive (approximately 50 cents per seed). It is also slightly more labor intensive, although the actual grafting went quite quickly. Whether or not grafting will prove to be worth the additional expense, and additional labor, we won’t know until the harvest at the end of this season.
We’ll follow up on the progress of these grafted plants in our next grafting post. We’re crossing our fingers that we’ll have some plants to show you that have healed, and are starting to grow!
———————
[1] Grafting for Disease Resistance in Heirloom Tomatoes. NC State University and A&T State University Cooperative Extension
[2] Grafting Tomatoes for Increased Vigor and Disease Resistance. Johnny’s Selected Seeds
Helpful Tomato Grafting How-To Videos:
University of Arizona Tube Grafting
University of Vermont Extension How to Graft Greenhouse Tomatoes
Ohio State University Grafting Tomato Plants


Clare, I am so happy that you made this post. It makes it very clear how to graft. I’m pretty sure some of my heirlooms arrived with wilt. I thought it was damping off at first, but it looks like something else because some of my older tomatoes are getting brown stems. First time I’ve had to deal with this issue. Lou
Oh Lou, I hope it’s not wilt. In the 25+ years of growing tomatoes, last year was the first time we’d had to battle with it. Standing there helpless as the plants withered was so frustrating, especially when seed is sown in February, and it’s months before harvesting the first fruit. It’s such an investment in time growing them conventionally as it is. I really hope this helps us, especially as our summer weather has been anything but predictable recently!
Clare this was incredibly interesting to me, thanks for explaining grafting so well. I’ll be interested to see the progress and hearing about the harvest at the end of the season.
We’ll definitely be following the plant’s progress this season. The goal is improved disease resistance, but we’re also curious about overall differences in growth, and fruit yield. For each grafted variety we plant, we’ll also plant a non-grafted heirloom as a sort of ‘control’, so we can compare the results directly. I can’t wait to see how this all turns out!
If you can’t find the PVC snap-on clamps, use jumbo binder clips found at any office supply store. I actually find the binder clips to be more versatile.
I agree, the binder clips are a good substitute, and I’ve used them in a pinch (no pun intended). They do rust after a season or two though, which is why we now buy the snap-clamps…in bulk! 😉
The grafting was definitely interesting but I really loved your little PVC construction to keep them humid. I’ve been thinking of using PVC to rig up some netting to protect my seedlings from hungry birds but wasn’t sure how to go about it. Now I have a model to copy. Thanks!
We use quite a bit of PVC here, and not just for irrigation. Our raised garden boxes have PVC hoops built in (which are removable) to support netting, or shade cloth. You can do something similar by tapping some rebar sections into the soil to slip the pvc hoops over too, if you don’t want to build an entire frame. The frames are nice for smaller spaces but can get unwieldy, or even sag, if they extend over larger areas. Regardless, it can be very useful for constructing cold frames, and supports in the garden 🙂
Clare this is absolutely fabulous…wish I had you as a teacher in biology class….so fascinating and you make it easily understood….can’t wait to see how it all comes out….my heirlooms don’t fare well here either so i am planting some more disease resistant and some heirlooms..
Well, it could all go horribly pear-shaped, but we’re crossing our fingers that our grafting experiment works. There are some heirloom tomatoes I’m simply not willing to live without! 😉
Wow, just, Wow!!
I really hope we’re saying that in October at the end of the harvest season, while we’re holding a large bowl of sweet, sun-ripened tomatoes! 😛
Quite fascinating, though I kept hoping to hear something about the goats ;-> Good choice of reading material in your sidebar!
Awww, a goatie update post very soon, I promise! I just had to force myself to spend the last week in the greenhouse playing catch-up. The goats have been entirely too distracting this spring!!! 😛 I’m enjoying Helen’s book…in my ‘spare’ time. I especially like its month-by-month layout.
Really well explained and illustrated, Clare. I have never grafted, yet we were taught this in Master Gardener school. I find it fascinating that it works in the first place.
Plant cells really are remarkable in their capacity to heal. I did feel a bit like Dr. Frankenstein cutting a piece off one plant, and attaching it to another. I just hope it works. Acclimating the plants to greenhouse conditions is taking some time!
Very informative post. Thank you!
It probably would have been easier to just buy grafted plants, but we had particular varieties we wanted to try grafting. We’ll have to see how this works out…
This sounds very interesting, Clare. You certainly worked very hard to create the perfect conditions, and I will be back to see how things go. Heirloom tomatoes have such a nice flavor.
There are already a few things I might do a little different next time. It will probably take a little adjusting to get the conditions ideal, especially as we’re trying to do this in a greenhouse, which some days can get a little warmer than I’d like. Grafting earlier in the season would have helped, but our planting schedules were a bit behind this year 😉
Best of luck to you on this very ambitious project! It’s pretty amazing to see people actually do some of the things I read about but am too intimidated to try.
After last year, I figured I didn’t have much to lose. The good news is, even if all the grafts failed, we still have plenty of each variety of tomato potted up, so we’d be no worse off. It will be fun to see some of these grow though, I can’t wait to compare them to the non-grafted plants!
How cool!!! I’m growing Heatmaster tomatoes this year. I’m worried they won’t be as tasty as an heirloom but they’re heat, humidity, and disease resistant. I hope you end up with a huge harvest!
Wow, that’s crazy-awesome!
One of the great sadnesses of my life is my newly developed allergies to the entire nightshade family. Life with tomatoes is very bleak, indeed.
When you talked about grafting tomatoes I wondered how you would handle those small stems but the clips are fantastic. Hope this works well for you.
Hello Clare, it is so lovely to read your post; very simply written, clear to follow and from an authority! I love those grafting clips, i dont know if our commercial grafters here already use that. But tomatoes are easily grown here so we only graft trees. But I love grafting in our exercises in college, i actually personally did that on tomatoes with eggplant. It would be very easy if we can use those clips as we still use polyethylene strands. I know the theory but i still havent done grafting outside college nurseries!