The weather this weekend was beautiful, with temperatures in the low 80’s here. Perfect weather for working in the gardens. Our vegetable garden sits atop a plateau, and is positioned above our orchard, which is planted on the slope below.
A lot of our soil is actually quite good here, especially in the orchard. It drains well, and contains plenty of organic matter. The vegetable garden, the one place you’d like to have ideal, free draining soils, well…it’s probably the worst soil on the property, and primarily mud-stone and sandstone.
Although the soil in the vegetable garden, if you could even call it soil, is poor, that garden area does get at least nine hours of full sun per day. We knew from the beginning that the location was a perfect place for the vegetable garden, but that we’d need to address soil composition and fertility.
The obvious solution was planting in raised beds, but first we needed to construct the beds. We wanted a simple, but sturdy bed system, one that would last. We noticed a simple design in the Sunset Western Garden Book of Edibles that seemed about right for our needs, and based our beds on that design.
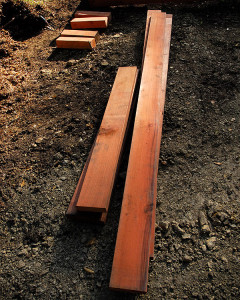
Clearly, as we’re planting edibles in these beds, pressure-treated lumber was out of the question. We considered engineered plastic decking-type materials, but they flex too much under the weight of the soil. Instead, we used sustainably harvested redwood for the lumber, as it is naturally rot-resistant, with no chemical additives, it’s renewable, and will outlast any other wood product available locally.
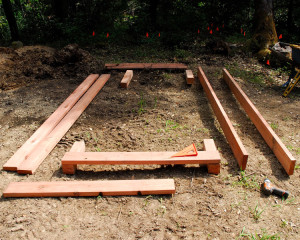
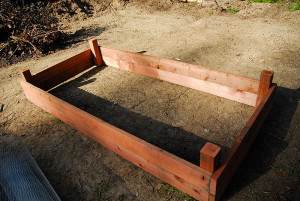
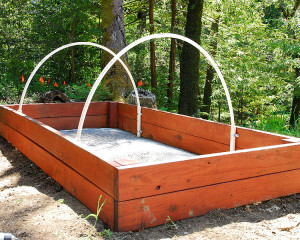
The boxes are very simple in their design, using 4″x4″ lumber for the ‘legs’, and standard 2″x6″ lumber for the ‘walls’. Once the lumber is cut, each box can be fully assembled, by one person, in under an hour.
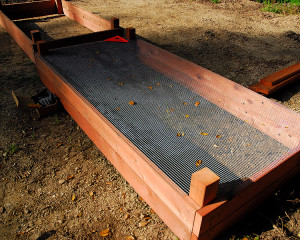
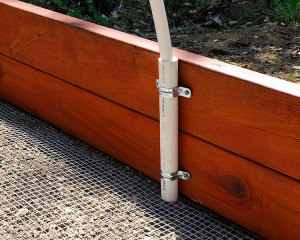
The bottom of each box is fitted with 1/2″ hardware cloth to keep moles and gophers at bay.
The ‘legs’ are intended to be buried in the ground, so that the base of the lower board is flush with the soil. This helps to hold the boxes in position, and keep the box square when filled with soil.
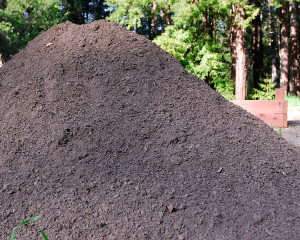
Each 8’x4′ box holds approximately 1 cubic yard of soil.
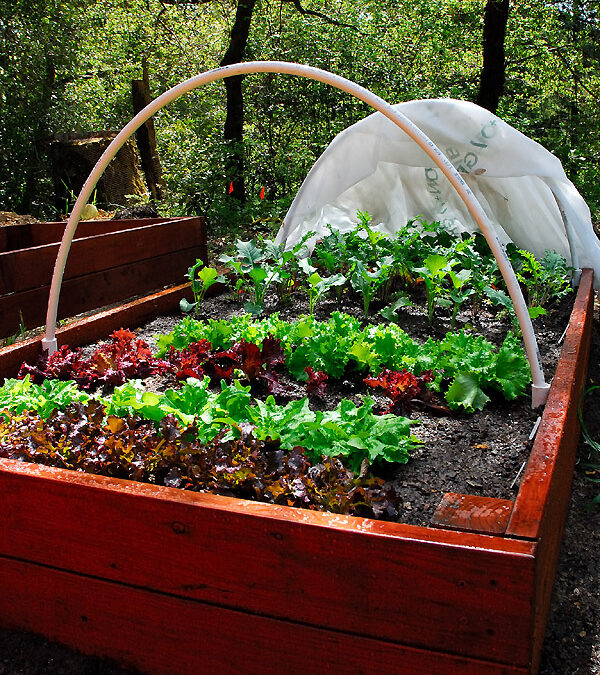
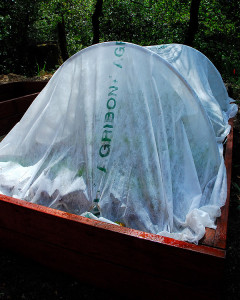
Some sort of hoop system is really essential in our garden. In winter the hoops can accommodate floating row covers to help protect frost tender crops.
In spring and summer, netting can be draped over the hoops to protect berries from browsing birds, or hold up shade cloth over crops sensitive to sun or excessive heat.
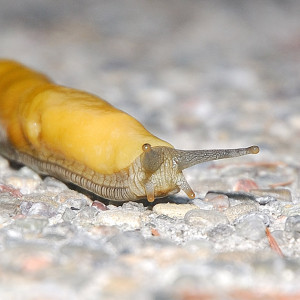
Most plants can benefit from being covered, especially young seedlings, even if it’s just to protect them from slugs, including our resident Banana Slugs.
The hoops themselves are six-foot lengths of 1/2″ schedule-40 PVC, and they simply slide into lengths of 1″ PVC pipe that are attached two-feet in from each end of the boxes. When the hoops aren’t needed for a box, the hoop can simply be removed, and stored flat.
Not everything we plant can be situated under hoops though, especially taller plants like tomatoes or beans.
The hoops are easily removed from the boxes that don't need them, and replaced in subsequent seasons as desired
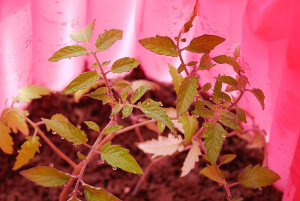
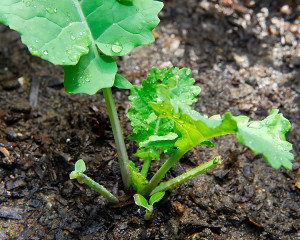
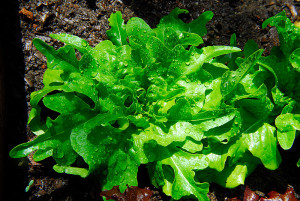
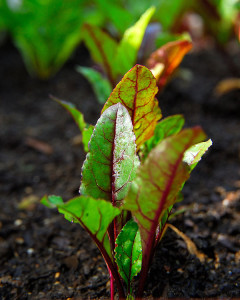
Our first box that was planted, was when the deer were continually jumping over the fence, and raiding the orchard and garden. We put out some ‘sacrificial’ greens (image at top of post), to see if our fence modifications were finally keeping the deer at bay. They worked, in that one morning we found some greens were nibbled on, so we knew we had more fence repairs to do.
However, since then, the deer seem to be staying out, and the damage to the vegetables was minimal.
Although we did have two young bucks hanging around outside the fence for most of the day yesterday while we were in the garden, they did stay OUTSIDE the fence. Our defenses finally seem to be holding! (Knock on wood).
Not all of our boxes are built yet. We have a shed to construct in the garden this year, so for now we’re holding off on building some of the boxes so we can still maneuver the tractor in the garden. We also need to focus our efforts on a new chicken coop for our older hens over the next week or two, as our young chicks will need some new accommodations very soon! Not to mention we need to rough in the drip irrigation in the vegetable garden. Our lists of things-to-do never seem to end! We’ll continue to build more boxes though as we need them, and hopefully by the time we’re ready for fall planting, the remainder of our raised garden boxes will be finished.






This was an ambitious project…well done! The hoops are a great idea…can’t wait to see pics of them in use.
.-= Penelope´s last blog ..Monte the Parrot in Our Garden =-.
It’s such a busy time of year! Good luck with the deer and slugs (my, he’s homely) … hum … those beet greens look yummy 🙂
.-= joey´s last blog .."THE PRIMROSE BANKS NOW FAIR!" ~ CILANTRO SCAMPI with CHEDDAR BISCUITS =-.
Beautiful! Monsieur Sluggeau is beautiful too!
Very nice! If our garden wasn’t so big we’d totally do raised beds. As it stands now, it would just be way too expensive.
.-= Dog Island Farm´s last blog ..Monday’s Guest Blog – Avocados! =-.
Well, it’s certainly not cheap for us either, but with our soil, we have little choice. However, once it’s installed, it should last a very long time, and at least our carrots won’t come out square 😛
I already have plans to hoop my raised beds this same way. I have the materials all scouted and priced out (will cost my about $15 per bed – not bad for an extended season); now I just have to actually buy the materials.
With the cost of the 1″ pipe, 1/2″ pipe, and 8 pipe clamps per bed, our cost is just under $10 per bed (not including the cost of the floating row cover). I do recommend pricing row cover in bulk. It only lasts a season or two when exposed to the elements, and the price per foot is MUCH lower in bulk. We purchased a 250′ roll (6′ wide) for approx. $95, which turns out to be about $3 per box. Much cheaper than the small quantities of cover available in small garden centers.
Love your banana slug portrait! Actually, I *really* love your bobcat portait, but couldn’t leave a message on that post.
.-= lisa´s last blog ..Our Taylor Made Hive, part two. =-.
Thanks Lisa, I actually think banana slugs are quite photogenic. Sorry you couldn’t leave a message on the other post. We automatically turn off comments on a post after 30 days to keep spam in check. We went through a run of tons of spam being posted to old posts 🙁
I am impressed by how well organized your garden is and how well made your structures are. The banana slug is pretty amazing too. I never thought slugs were good looking till I saw a close-up!
.-= debsgarden´s last blog ..The Garden Speaks in Colors =-.
I am glad your deer defences are working – you would not want to lose all your vegetables. I like raised beds for vegetables – easier to care for and your removable hoops are a clever idea.
.-= easygardener´s last blog ..A Famous Belgian =-.
Well, I can’t take credit for the hoop design as we did borrow that from the Sunset Edibles book. However, it works great, and I like that this method uses a minimum of pipe. For aesthetics though, I am tempted to paint the pipe green so it doesn’t stand out so much.
Congratulations, I’m so glad the deer are staying out now. The boxes seem such a nice height for nibbling, if you’re a deer (kind of like the bird bath in the Country Mouse garden, perfect for the dog to have a drink). So, I’m glad you have the fence.
I’m imagining the conversation the two deer were having while watching you guys working. “Dude, what are they doing in there? They planting lettuces? Man, those were tasty. Let’s go rub our antlers on something.”
.-= Christine´s last blog ..An Afternoon in Town Mouse’s Garden =-.
…”while we’re waiting…and if we’re lucky maybe they’ll plant more of that scrummy kale too”…:P
They really were stalking us. We chased both bucks away from the gate three or four times that afternoon. I looked like a deranged traffic cop running toward them flailing my arms about. I swear they found it very amusing!
wow, quite impressive indeed, thanks for the series of photos and the process, i think you did an excellent job, love the boxes.
.-= noel´s last blog ..A Lotus Pond at the Edge of Punaluu =-.
I love raised vegetable beds! Yours is quite impressive. I do have memories of my encounters with banana slugs while spending summers in the Santa Cruz mountains. Aren’t they the mascot of UCSC?
.-= Noelle / azplantlady´s last blog ..Leaving the Wardrobe….C.S. Lewis =-.
You’re right Noelle, it is the UCSC mascot. We’re both former ‘slugs’ ourselves 🙂
I’ve never heard of a banana slug before. Those raised beds are excellent and so well made – built to last! Interesting feature with the lining in the bottom – I’ve never seen that before – is that a USA thing Clare or did you see it done in the UK when you were here? I’m thinking that it would be a great way to deter moles. 🙂 Rosie
.-= Rosie leaves ‘n blooms´s last blog ..A Postmortem, A Challenge and a little Theatre =-.
The wire bottom lining is something I learned here. I think when you live in gopher territory you have to adapt and find ways to keep them out. I like the hardware cloth because the holes are a bit smaller than traditional ‘gopher-wire’ and it’s quite thick, so it lasts longer. If the plants need to they can root through it too. It might be a little overkill with our mud-stone up there, but we have had gophers in the orchard, and it’s easier to put the wire on before we fill the boxes 😀
What great raised beds! I love mine, they were built, just because I like the look of them, but I see with that soil you have, you really needed them. Great ideas about the hoops as well, love it.
.-= Deborah at Kilbourne Grove´s last blog ..Silly for Scilla =-.
Raised beds are the best. I am really enjoying the ease of a fairly weed free and ease of gardening style.
Have fun in your lovely veggie garden.
.-= keewee´s last blog ..Create mini green houses with 2 items =-.
Great article. I sure understand the” need” for raised beds. The area where we had to put ours has very poor soil. So we have just put in a new potager. I just got it stained a few days ago. I have access to a neighbors horse manure, and 1/2 of my beds are made up of well aged manure, Tilled very fine.
.-= Tammy´s last blog ..Pieris Japonica "Mountain Fire" =-.
I love your boxes, and I know why…we used the same plans as our inspiration. They are a perfect height to work in. I love how you showed how you used the PVC for hoops. I had been trying to figure out how to make that work, now I know what to do.
Glad the deer seem to be keeping out, I’ve been wondering if they were back again.
.-= Catherine´s last blog ..The front yard in Spring. =-.
I rather like the effect of the red plant covers all by themselves, but yes a garden really should be about plants… I like your point about how a raised bed gives you much more control over what a plant has to grow in. My own veggies do much better with some added elevation gain, even if the bed is raised only a few inches.
.-= lostlandscape (James)´s last blog ..owning the weather =-.
I was just about to go buy the supplies to build two new beds, perfect timing! I hope you don’t mind if I borrow some of your wonderful tips. The dream raised bed. Thank you Thank you!
Hi.
You did a great job.
I like a lot the boxes you design and the hoops to protect your vegetables.
.-= ellada´s last blog ..Truites – – – Trout – – – Πέστροφες =-.
Hi there,
Where did you get your little red teepees from?
UDG, I sourced these through Gardener’s Supply Company as my local garden centers didn’t have them:
http://www.gardeners.com/Red-Tomato-Teepees/VegetableGardening_TerrificTomatoes,34-952,default,cp.html
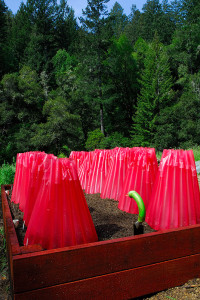
They come in a 3-pack (approximately $5 each). This sounds a little expensive, but they do last for multiple seasons in the garden. When I’m done with them, I drain the water, and stack them flat (don’t fold them, or they may wear along the crease).
We’ve used a product similar to these for years, commonly known as Wall-o-Water. As the water in these teepees traps and re-radiates heat at night, keeping the plant and soil warm, it allows us to plant out our tomatoes, even in unsettled, cold weather, and accelerates our growing season.
Beautiful raised beds and a great tutorial…I am sending this link to my little sis! gail
.-= gail´s last blog ..Yummy Buttery Yellow =-.
Excellent beds. I saw the same plans in an older Sunset magazine, and we’re going to do something similar this weekend. For us, it’s hard clay and, well, more hard clay. Raised beds are the only way to go. Just found the blog today. I’ll definitely be visiting frequently.
I think I’d originally seen them either in the magazine, or perhaps Sunset’s blog, but then for a long time I couldn’t find the plans. I was happy to see they finally published them in the book.
They really are amazingly easy to put together. I was a little skeptical that the 2x lumber might flex once full of soil, but the boxes are remarkably strong. If you make the boxes longer though, a center brace might be a good idea so they don’t flex over time.
The hoops are easy to put in and take out as needed. One tip though, when you insert one end of the 1/2″ PVC into the hoop holder, only push it in 1-2 inches at first, don’t try to push the pipe down to the bottom of the 1″ holder. Otherwise it’s difficult to bend the 1/2″ pipe into that tight of a radius. Once the pipe is bent over, you can adjust the legs in the holders. Have fun building your boxes! 😀
Those raised boxes are beautiful! I need to show this post to Chuck…
.-= Kyna´s last blog ..Went Down to the Cemetery, Lookin’ For Love… =-.
I was so glad to read that you have redwood instead of pressure treated wood which I have seen in other posts. Yikes! Your boxes are so well built with the hoops secured that way. Very impressive. Your plants are too … and out smarting the wildlife … well done.
.-= Carol´s last blog ..Earth Dance Courtship =-.
Those are great and efficient veggie beds. It would have been easier to have actual soil there, but now everything will be easier to reach. I like the built in hoop holders too. Very well done.
.-= Brad´s last blog ..Wildflowers in Tilden =-.
I can’t believe that mudstone! Yikes!!! Congratulations on such a beautiful raised bed solution. 🙂 Your greens are looking yummy, too!
.-= Eliza´s last blog ..How to Identify Eastern and Forest Tent Caterpillars =-.
I love raised garden boxes!