There’s actually a little snow in the Santa Cruz Mountains this morning, though not here at Curbstone Valley. We did receive an inch of rain overnight though, not bad, but not as much as we were initially expecting. The current storm was expected to have the potential to produce ‘excessive rainfall’ so we spent part of this weekend clearing drains and gutters, yet again. Once that was taken care of though we diverted our attention back to the deer fence project.
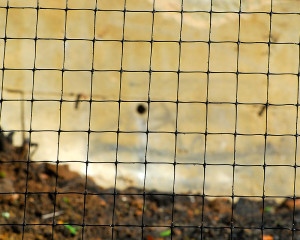
With the prep complete, and the stakes in the ground, it was finally time to unroll and install the fence! When selecting which type of fence to use, we had some key factors to consider. The first was, do we opt for metal deer fence? Metal fence certainly would be stronger than any plastic product on the market, however, half of the fence is being installed uphill of the orchard on a significant slope. Metal fence would likely be too heavy for us to drag up and down the hills here. We needed a fence material that would be strong, but lightweight enough for us to wrestle along the hillside by ourselves. Another consideration is that the orchard is located in front of our house, along the main driveway, so we were looking for a fence that wouldn’t be too visible from the road, and destroy the surrounding woodland aesthetic. For our situation, the logical choice was to use a heavy duty plastic (and recyclable) deer fencing material.
At first we had a difficult time finding quality deer fence products locally. The larger home centers and our local hardware stores only carried thin polypropylene fence that’s more akin to the bird netting that you’d put over fig trees or raspberry bushes. It’s really not going to do much to exclude curious deer. We enquired with the UC Santa Cruz Arboretum, no stranger themselves to excluding deer from their gardens, as to their sources for high strength plastic deer fence materials, and we were directed to some distributors online.
We assessed our fencing options, and ordered heavy duty UV-resistant deer fence with 1.75-inch mesh size, in 330 ft rolls, along with the other materials we’d apparently require for installation, which included 9ft angle steel posts, 12 gauge monofilament, heavy duty zip ties, 12″ kinked ground stakes, a hog-ringer and rings, and some white warning tape.
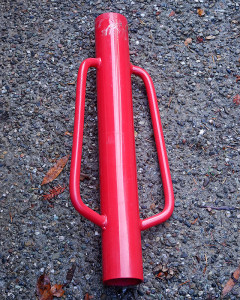
For installing the fence, our first task, once the site was cleared, was to mark out and install the posts. The posts were driven in the ground with a post driver, 15-20 ft apart, leaving 7ft of the angled steel above grade. Posts weren’t needed where existing trees could support the fence, but the trees all needed to be marked at 7ft to keep the fence height even around the entire perimeter.
The 12-gauge monofilament line was then installed around the perimeter of the orchard and vegetable garden area through the uppermost holes in the angle steel posts, or loosely U-nailed to the trees. This line is used to support the top of the fence between the posts. It helps to prevent the fence from sagging over time, but if the fence should sag slightly, a wire tensioner can be used to adjust the monofilament line tension around the the fence’s perimeter. Once the monofilament was installed, and the tension established, the fence could finally be unrolled, which sounds simple, but when installing it on variable slopes it does present some minor challenges, and results in a few sore muscles.
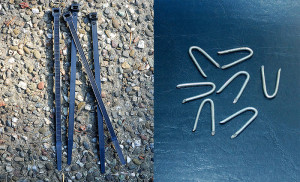
The fence is secured to the posts using self-locking ties, or to existing trees using galvanized U-nails
As the fence is unrolled it is secured to the posts using uv-resistant heavy duty self locking ties, at least 5 per post. Where trees are supporting the fence, we secure the fence using heavy duty galvanized U-nails.
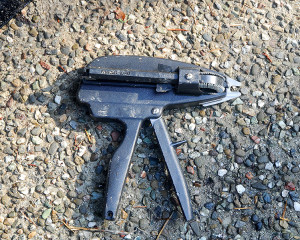
Once the fence is secured to the posts, a hog-ringer is then used at 2-3 ft intervals to secure the top of the fence to the monofilament line that runs between the posts.
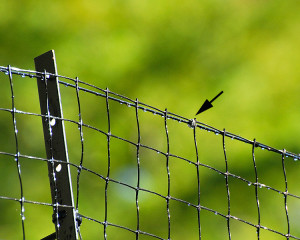
The hog-rings attach the top of the fence to the monofilament line, but still permit the line to be tightened to take up any sag in the fence
The rings help to keep the top of the fence supported between stakes, without clamping the fence too tightly to the monofilament, so as needed during the lifespan of the fence, the line can be tightened to remove any sag that may occur without having to disconnect the fence. Similarly, a second monofilament line can be used along the bottom of the fence as needed to help keep the base of the fence square to the posts. The hog ringer is also very handy for securing the fence to itself at the seams. Where two rolls of fencing meet, the ends are overlapped a few feet, and secured by using the hog-ringer every few inches.
The fence stakes sit 7 feet above grade, but the fence material itself is 7.5 feet high. The last step for installation is to ensure that the base of the fence is toed out away from the gardens 6 inches all along the bottom of the fence line, and anchored to the ground with 12-inch kinked J-stakes spaced 5 feet apart, to help discourage bunnies and the like from scrabbling underneath the fence.
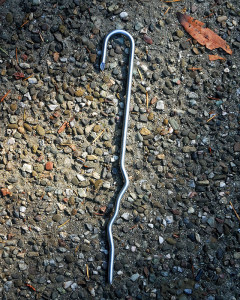
Kinked 12-inch ground stakes anchor the bottom of the fence to prevent deer and rabbits from pushing underneath
With the top of the fence supported, and the base of the fence anchored to the ground, our installation is almost complete, with the exception of the section above the orchard that should be finished once our weather clears.
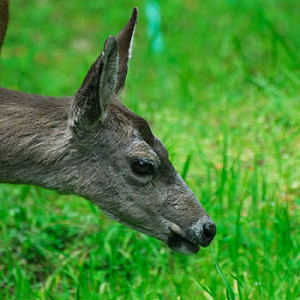
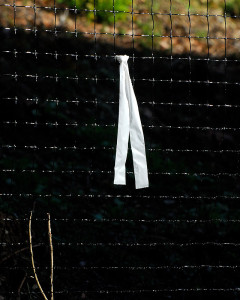
It is important to note that we were very careful to install this fence without crossing any major existing deer-trails near the garden and orchard, in the hopes that the deer will not try to short-cut through the fence. Blocking frequently used deer trails increases the likelihood that an unsuspecting deer will plough through fence and break it. Even with 600lb per square foot breaking load, the fence could still easily be broken by an adult deer charging it head on. To make the fence more visible to the deer we installed strips of white marker tape approximately at deer eye-level around the fenced in perimeter. This should help make it apparent to passing deer that the fence is there, especially at night, and hopefully help us to avoid messy fence repairs. These strips of ribbon should be able to be removed in a few months once the deer have acclimated to the fence’s location.
Now that the fence is almost complete, the next step is to order the lumber to construct the gate under the arbor, and our raised beds for the vegetable gardens!
———————————————————–
Online retailers of heavy-duty deer fence include:






Great post! Country Mouse has been thinking about a deer fence forever. I’ll point her to this post (once the greenhouse is up…). I’ll be curious to hear how this works out, especially along the slope. I’ve heard deer are pretty inventive and can jump pretty high fences.
Deer can be very inventive, and with the advantage of a downhill run, the 7ft section of fence alone on the upper slope may not be enough. If they do find their way over the fence, we’ll run a second line of fence behind the problem area, set back about 5 feet from the first, and hopefully that will slow them down!
Your double fence with some space between is the most effective way of keeping them out. Well, that or a 12′ fence. I have enjoyed watching your progress.
In our part of the country a double fence is supposed to keep deer very well. They apparently can not judge the distance between the fences and decide not to even try to jump it. Enjoyed this helpful post!