In our last tomato grafting post we discussed why we’ve chosen to try grafting some of our favorite heirloom tomato varieties this season.
Tomato grafting isn’t new, and many commercial producers rely on this method of heirloom tomato production to improve disease resistance, and increase fruit yield. However, we questioned whether or not grafting would be worthwhile on a much smaller scale, even for the home gardener. By the end of this season, we hope to have our answer.
At the end of the last post, our newly grafted heirlooms were sitting in a darkened humidity chamber while the graft unions were starting to heal.
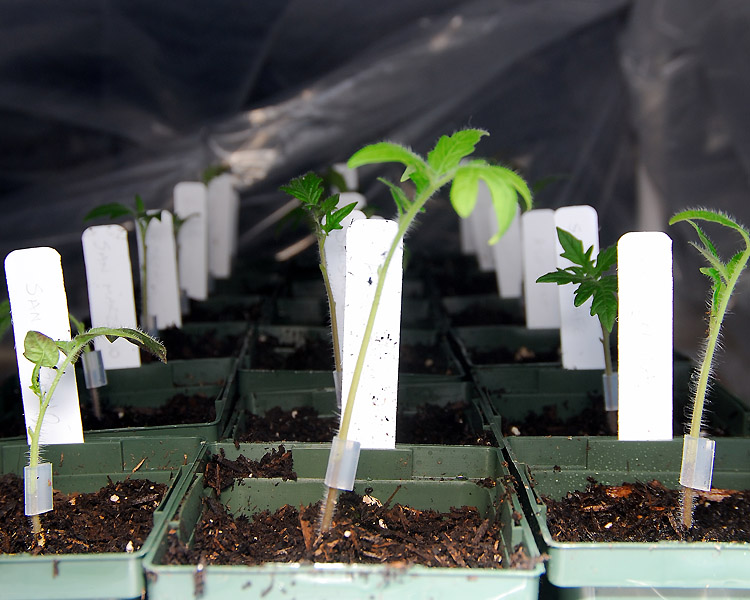
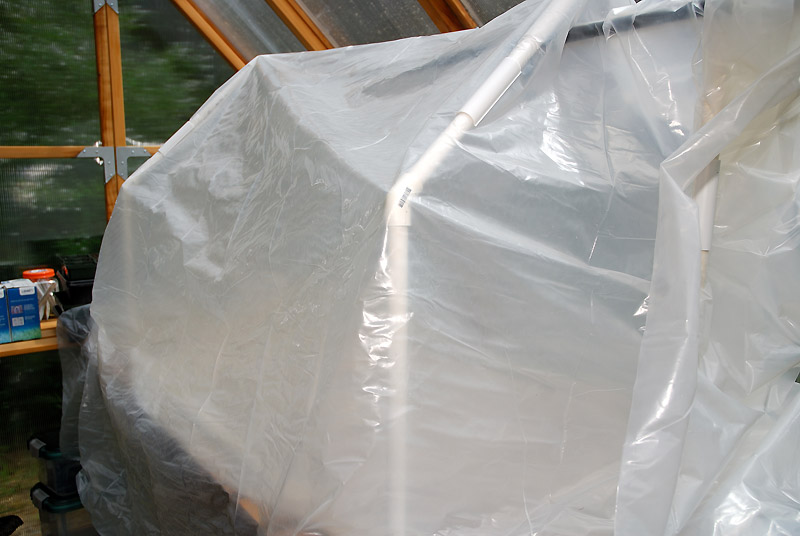
Once the grafts are prepared the plants require minimal light, and high humidity, while the graft union heals
For the first three days the chamber was kept completely dark. Gradually, over the period of 3-4 days, the light blocking plastic was removed, but shade cloth was kept in place to enable the grafted plants to slowly acclimate to the increase in light.
The next step was to slowly decrease the humidity level in the healing chamber, by gradually increasing the ventilation. We simply opened up the sides of the polyethylene ‘tent’ a little more each day. As a result of some warmer than expected weather, this process took somewhat longer than anticipated, and it was at least a week before the plants were eventually acclimated to greenhouse temperature and humidity conditions.
It's important to monitor the grafts for signs of wilting, and heat stress, during acclimation
On a number of occasions the humidity levels needed to be increased, by closing the ‘tent’ back up, to prevent the plants from wilting excessively, but eventually the plants adapted and were moved out onto the greenhouse bench.
Next season, we’d do a few things differently. For one, we’d be sowing seed on schedule, rather than being a few weeks behind as we’ve been this season due to too many projects going on at once. Although the grafts need warmth and humidity, excessive heat during healing makes it more challenging to acclimate the plants after healing.
The biggest change will be that next year we’ll try placing the plants, immediately after grafting, under a humidity dome inside the healing chamber.
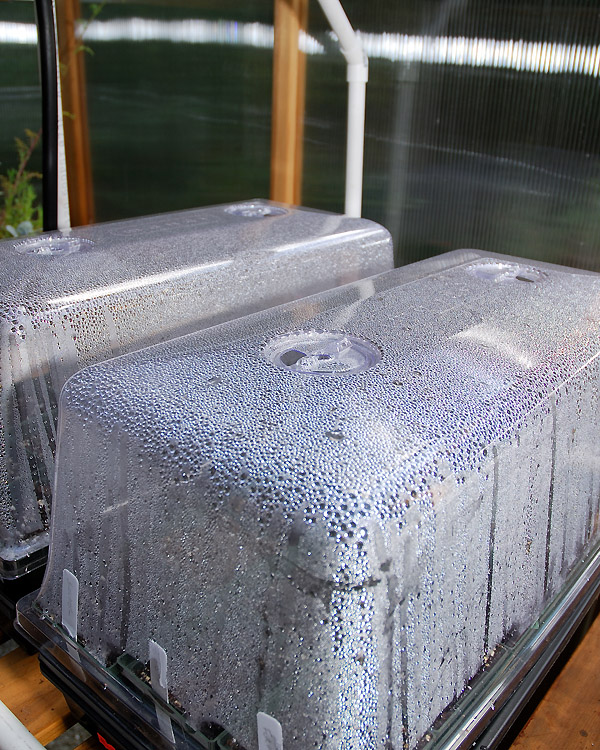
A vented humidity dome may make it easier to maintain the desired humidity levels during the first few days of healing
Although the chamber worked, we did struggle to get the humidity up high enough, and maintain it high enough, during the first few days.
The humidity chamber we built worked fairly well, but the volume of space made it challenging to keep the humidity high enough around the plants in the first few days of healing
This is when most of our losses occurred, as some grafts wilted to the point of no return.
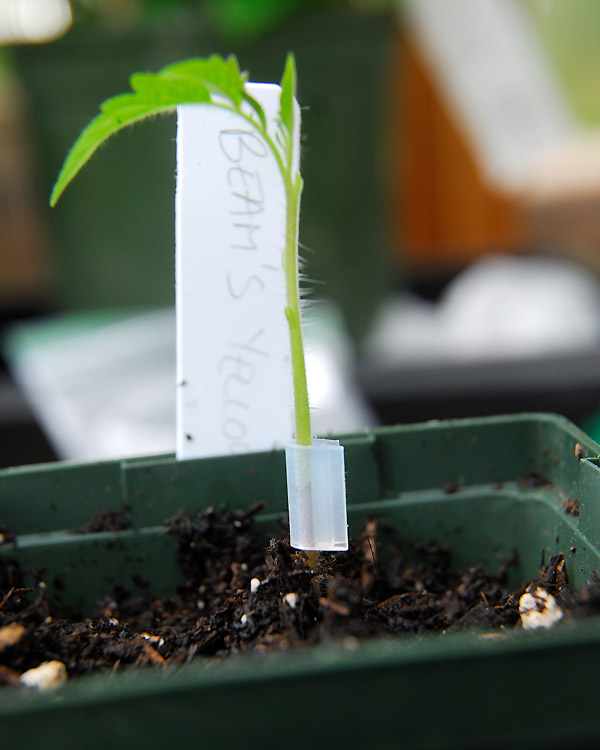
We’ll also be more aggressive when trimming our scions, ensuring we only leave the growing meristem intact, and all other lateral growth will be removed. The less the plant has to support during the first few days, the better off the plants will be overall.
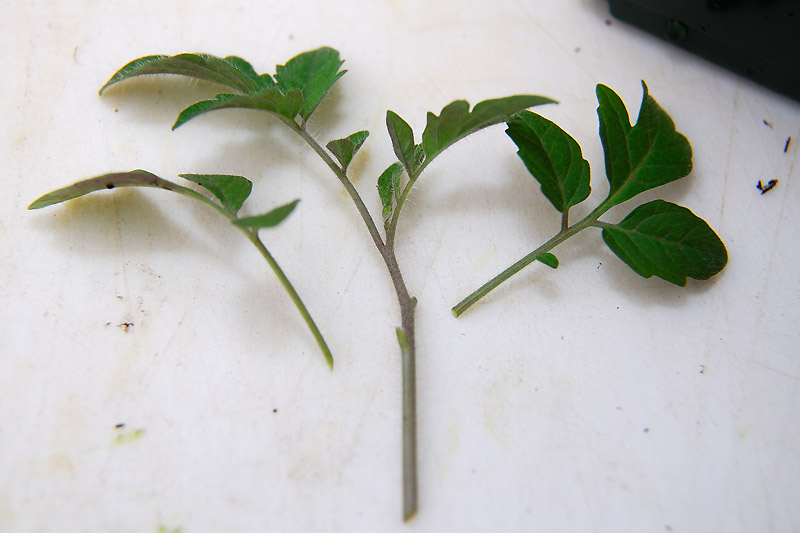
The single leaf on the growing meristem is all that is required to be left on the scion. More than that, and the plant may struggle to support itself
Overall, we lost six plants of twenty total that were grafted, which translates into a 70% success rate. Not bad for our first attempt at grafting, but we’d like to try to improve that percentage next time, if grafting ultimately proves worthwhile this season.
Once the plants were acclimated to the greenhouse, it was just like raising any seedling in the greenhouse. We waited until the grafts were not only healed, but were showing clear signs of strong growth before transplanting them out into the garden.
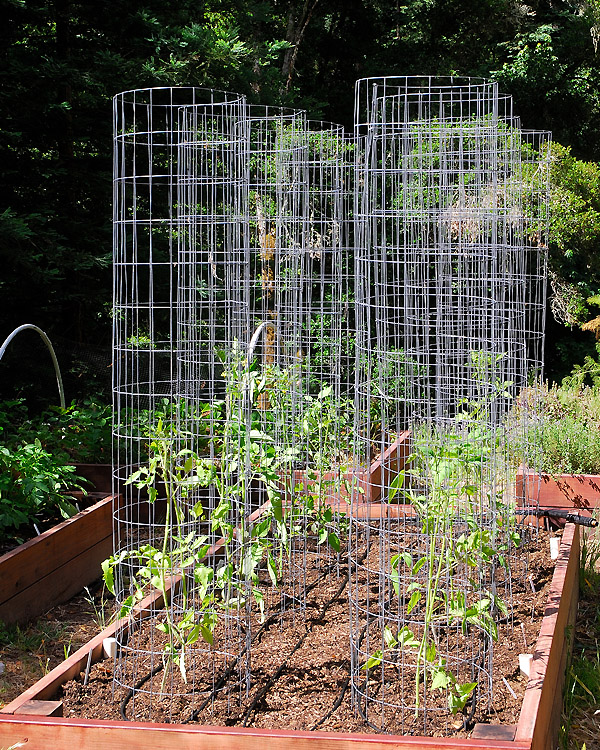
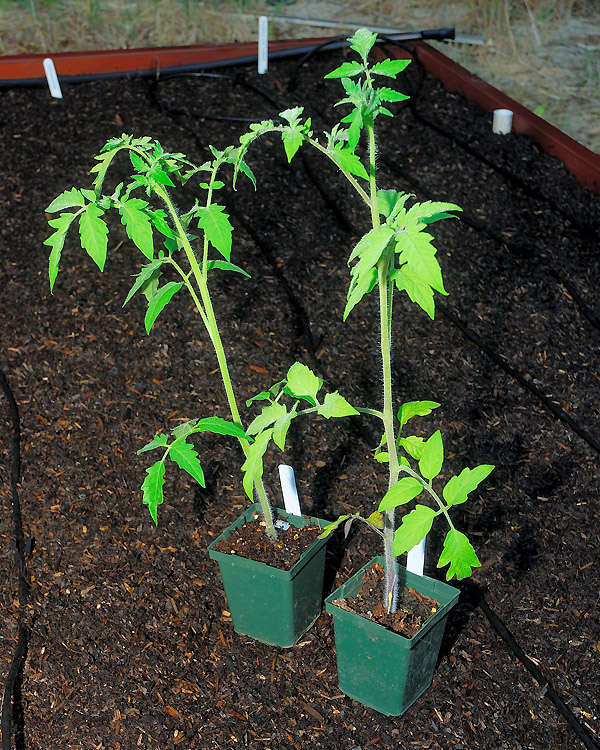
For a fair, and direct comparison, of grafted versus non-grafted plants, this year we’ve planted the tomatoes out in pairs (one grafted, and one non-grafted plant) for each variety.
We'll be interested to see the differences in growth, and fruit yield, between the grafted vs. non-grafted plants of the same variety
After the grafts were healed, comparing the grafted versus non-grafted plants, it was clear that the healing process had set the plants back significantly.
Here the grafts are half the height of the conventionally grown tomatoes.
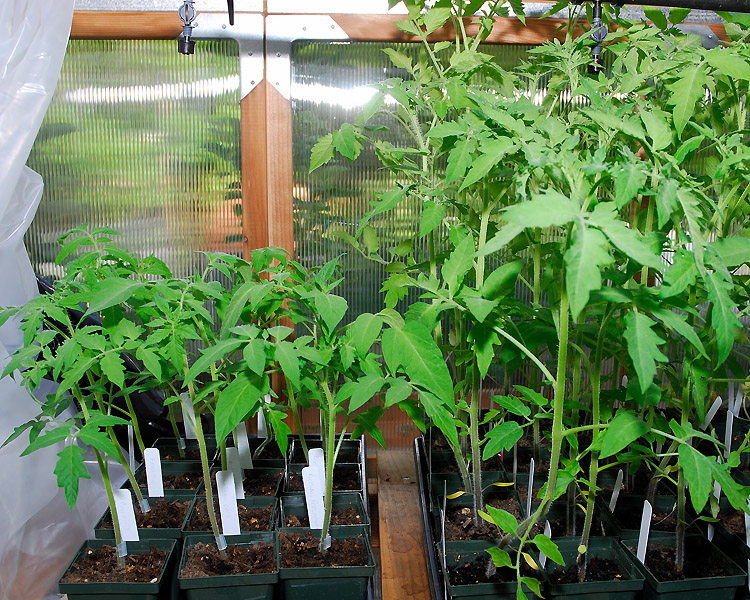
The grafted plants on the left, although the same age, are much shorter than the conventionally grown plants on the right
However, just prior to transplanting we could see clear evidence that the grafted plants were showing increased vigor overall. Within 10-12 days, the grafts had almost caught up, and I won’t be surprised to see the grafted plants exceed the height of their non-grafted counterparts now the plants are in the garden. I wish I could skip ahead to see how all this all turns out!
Although the grafted plants (left) were much shorter initially, by transplanting time, the grafted plants were almost as tall as the non-grafted plants (right)!
The greatest consideration when transplanting out grafted tomatoes is that they can’t be planted too deeply. Normally we remove the lower leaves of a tomato plant, and bury the transplants deeply in the soil. The section of stem planted below the soil line produces additional roots to help support the plant during growth and fruiting.
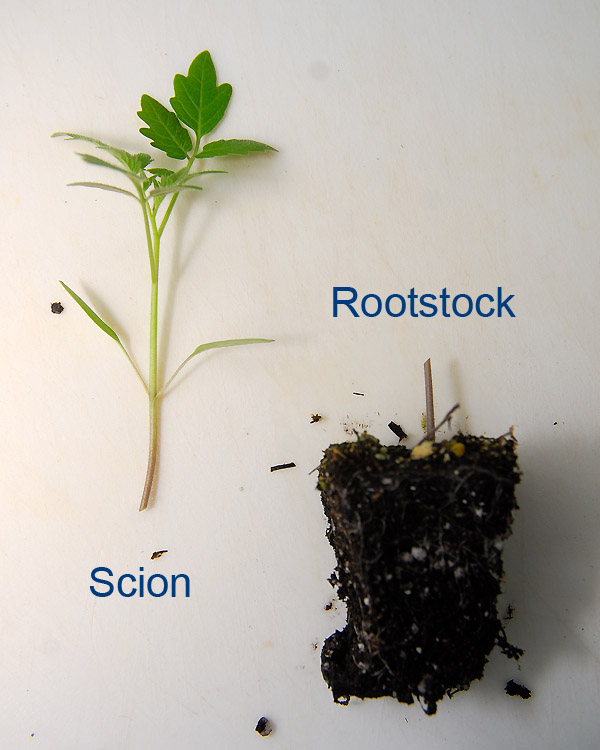
Remember, the grafted plant is made up of two parts. The 'scion' is the heirloom variety you want to grow, and the 'rootstock', in our case Maxifort, is the disease resistant portion of the plant
However, with a graft, the whole purpose is that you want the disease resistant rootstock to support the plant. If you bury the transplant so that the scion stem (i.e. the heirloom part of the plant above the graft union) is below the soil line, you negate the entire purpose of using a disease resistant rootstock as soon as the scion produces its own roots. As such, it’s imperative to keep the graft union above the soil line when transplanting, so the only roots that grow, are from the disease resistant rootstock.
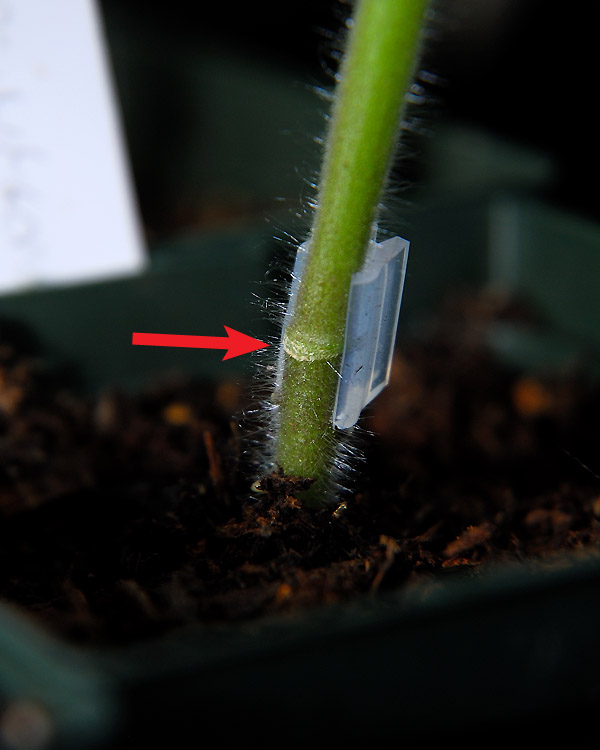
The graft union MUST be kept above the soil line to prevent the scion from developing roots of its own
As the plants grow we will need to watch for, and remove, any suckering growth being produced from below the graft union, as this will be rootstock growth. Beyond that, these grafted tomatoes will be treated no differently than the other plants.
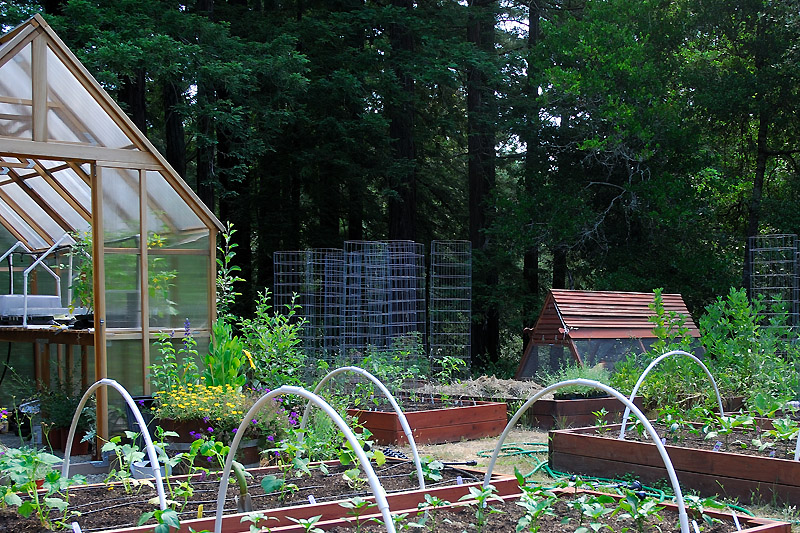
The tomatoes, grafted and non-grafted, are being grown in the same beds, under the same conditions
Thus far, even though the grafted tomatoes initially seemed to be at a disadvantage, the increased vigor of the Maxifort rootstock that we grafted to appears to be making up for the lack of growth during the healing period.
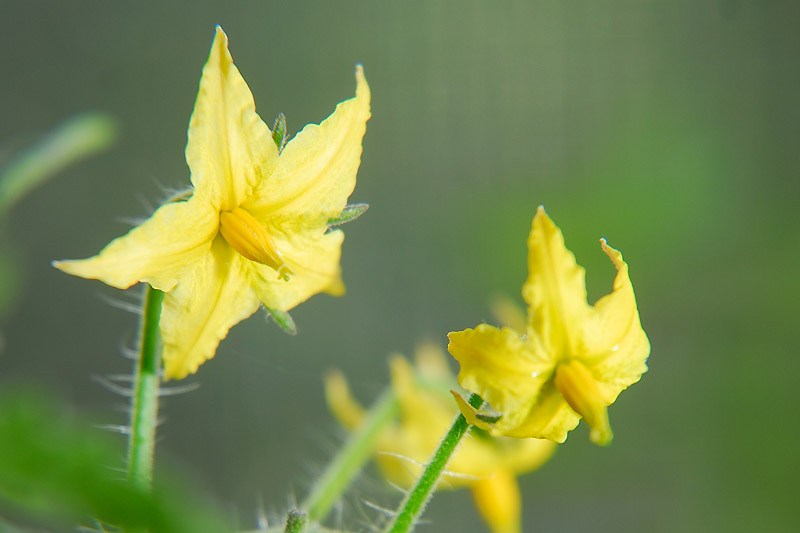
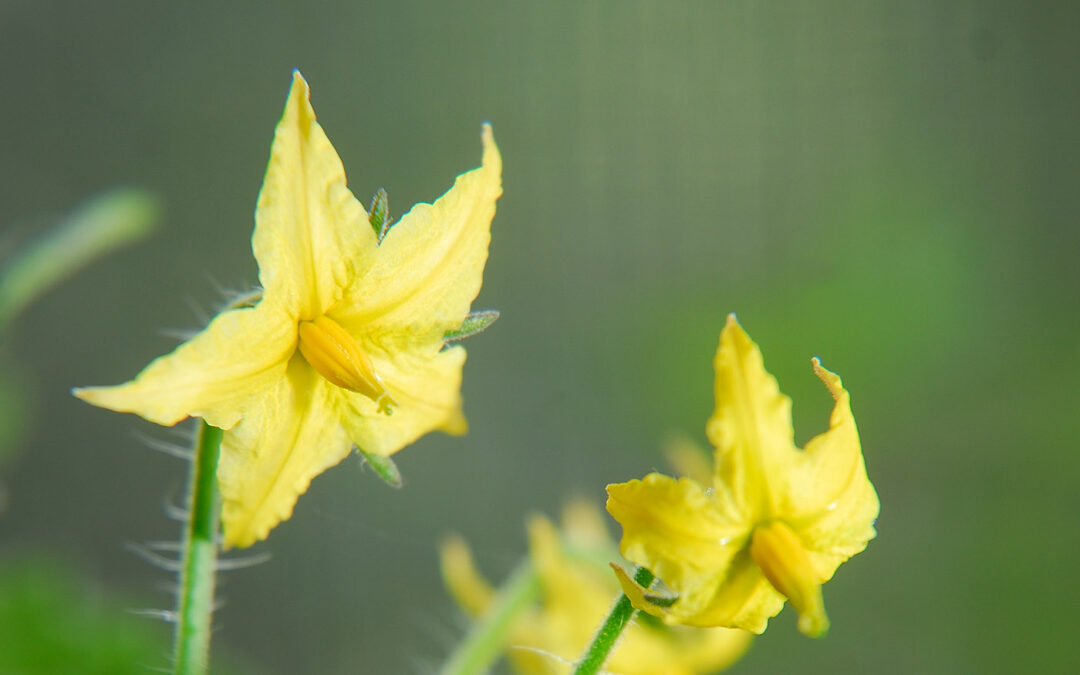
The plants are now in bloom, and hopefully soon we'll see the first signs of fruit set
What we really want to know though, is how these plants perform in regards to fruit set, and disease resistance, throughout the summer.

Last summer was cold, damp, and dreary. This summer we're hoping for lots of blue skies!
For that we’ll have to wait and see, and hope that this summer the weather cooperates!
———————
Helpful Tomato Grafting Information:
Grafting for Disease Resistance in Heirloom Tomatoes. NC State University and A&T State University Cooperative Extension
Grafting Tomatoes for Increased Vigor and Disease Resistance. Johnny’s Selected Seeds
How-To Videos:
University of Arizona Tube Grafting
University of Vermont Extension How to Graft Greenhouse Tomatoes
Ohio State University Grafting Tomato Plants


feel a bit silly, telling you I planted 3 tomatoes today. Mine are compost volunteers. One has flower buds already.
I actually love compost volunteers, they’re usually so far ahead of the varieties we start from seed. Unfortunately, as we grow heirloom tomatoes, if Fusarium is in our soil, even those will succumb to disease 🙁 We’ve never had to graft to before, as we’ve never had an issue with disease. We just love our tomatoes so much, that if we have to endure a harvest as bad as last year, we might have to move! 😛
An interesting experiment indeed, Clare. I like that you aren’t afraid to try something tricky… Will look forward to seeing the project progress.
In this case I figure for a little extra effort, the results can’t be worse than last season. They could be as bad (if all the grafts had died), just not worse 😉 If I could be content growing ‘early girl’, and ‘better boy’, this would have been a non-problem. Life without ‘Russian Persimmon’, and ‘Black Pear’ though, simply wouldn’t be as much fun 😛
This is one of the most interesting garden experiments I’ve seen this year or any, and I’m eager to see the results! The not burying deep restriction seems like a big negative to me, so I really want to see what happens.
It feels odd to me too. I really had to restrain myself when I was planting the grafts. I can only hope that the rootstock roots are so vigorous, that they’ll make up for the shallow planting, but it goes against about 30 years of tomato planting experience for me! Of course, we won’t know until later in the summer how it will work. I could be persuaded to plant shallow in the future though, providing we get a healthy crop of tomatoes from our grafted plants!
Weather is always a bit of a monkey, isn’t it? 70% seems really good, but I guess you won’t know until you compare the final harvest. This experiment is fascinating and very well done. I’ll be following along!
Despite a few graft losses, I think overall it went quite well, but you’re right, the proof will be in the final production. Roll on summer!
fascinating expperiment. With ungrafted controls, it will be meaningful. I hope you will keep us posted with results. Now I can see why grafted tomatoes cost so much. I’m keeping my fingers crossed on my heirlooms. It looked like they were going to succomb to disease, but they seem to have recovered and are growing like crazy, especially the Black Plum and Box Car Willie.
I really wanted to compare the grafted and ungrafted ‘controls’ directly, under the same conditions. In a warm, relatively fog-free summer, we have no trouble growing tomatoes, but in a year like last year, it can be almost impossible. As weather is such a large variable, the ungrafted plants seemed necessary if we were really going to learn much from this experiment. I’m glad your tomatoes are turning out ok!
Wow, I am glad to hear about this lovely follow-up of the first post. I just wished you also posted the full flowering plant instead of just the blooms. I will guess that it is really disease resistant but maybe the fruits are less because i think it will mature earlier than conventional. I will be following for more updates! …and thank you!
The grafts that are flowering, don’t look much different to their non-grafted counterparts. For ‘Stupice’, both the grafted and non-grafted plants are in bloom. I’m just amazed how quickly the grafts managed to catch up once they’d healed. As we’re growing indeterminate plants, the fruits shouldn’t be less. The rootstock is supposed to increase disease resistance, as well as increase overall vigor, and fruit yield. The question we have is, how much, and is it worth the extra steps for us to produce grafted plants ourselves? That we likely won’t have an answer for until September or October, but I will follow up on this post, as I know we’re not the only ones struggling to grow heirlooms.
Thanks for the follow up post Clare. This is really interesting to follow along and learn about. I never would have ever thought to graft a tomato plant before but the reasons make sense (especially since i lost all my heirloom plants to blight last year!). I wonder if you will need to do this over a period of a couple years to really get a sense of the results since weather is such an important variable.
I think, as we have non-grafted control plants, that we’ll learn something from this season in regards to growth, yield, and disease resistance. However, you’re right. Grafting over a few years will give us more information, especially as our weather here along the coast can be so variable from one summer to the next. In very hot years the plants seem to thrive, but bouncing from cold to hot like we did last summer seems to place the plants under a lot more stress.
I am interested to see the difference in growth and yield between grafted and non-grafted. I hope your work pays off…so interesting.
At this point, if we can just get back to where yields were when we had healthy plants, I’ll be very happy! Our basil seemed awfully lonely last year 😉
my tomatoes went out Memorial Day Weekend to be greeted a few days later with cold, wet weather…hoping the hot weather comes back soon and they recover…looking like mighty sad plants…yours are amazing..can’t wait to see how it al turns out for you and for me 🙂
I hope your plants bounce back soon. I’m sure once the sun comes out, and stays out, they’ll be thriving in no time. I’m still waiting to see if we fall into our typical ‘June Gloom’ summer fog pattern this summer, but so far we seem to have plenty of blue skies, so I’m not complaining!
I’ve never considered grafting tomatoes before especially since the comparison of grafted vs. non-grafted on Gardeners World (UK Gardening TV programme) showed that they didn’t see much difference in the productivity of the plants. However it seems that you’re already seeing some improvement in the growth ability so I’m looking forward to seeing what the harvest output will be. Will you be measuring the weight of each plant’s tomatoes at all?
I’m not sure if that growth rate will be sustained, but I’m curious to see if it is. I’d be happy if our productivity for a grafted plant is equal to the same variety of a non-grafted, but healthy, plant. We’re not looking for an exorbitant increase in fruit production, as much as healthy plants that are capable of producing modest yields of fruit. We will measure production this year. We did a couple of years ago, just to have something to track for yields per each variety. Last year, production was so dismal, we didn’t bother 😉 I’ll do an update later in the season on overall growth and vigor, but also look for a harvest summary around late October this year in regards to yields.
I admire how methodical you are. I wouldn’t do all this work even if the experiment were guaranteed to work. We just decided not to grow heirlooms this year even though I like them better. Just too iffy.
I’d be very sad if I couldn’t grow heirlooms. They are more fussy, but for me the extra hassle is worth it, at least I’m hoping it will be this year, even if the harvest is just as good as it was a couple of years ago. The grafting itself actually wasn’t much work, but baby sitting the plants in the greenhouse while they acclimated, was definitely a little more time consuming.
I enjoyed the follow up post too Clare. You really explained the process and reasoning very well. I have grafted and agree with Carolyn, it is quite a bit of work and careful monitoring.
The monitoring was the greatest time loss. Now they’re in the garden though, except for cursorily watching for rootstock growth, they’re no more trouble than the regular plants. Of course, if the non-grafted plants start to struggle with disease, those end up being more work, and loss of time and energy, than I’ve put into the grafts thus far. If this does work, I think the amount of time involved to produce tomatoes will actually be less for the grafts by harvest.
This is very interesting! I love tomatoes, and the idea of heirlooms appeals to me. But most heirlooms I tried succumbed to disease or had poor fruit production. I look forward to seeing your results!
We have friends that though we were ‘brave’ to try growing heirlooms a few years ago, and they said the same thing. They only grow disease resistant hybrids now, and that’s fine, I understand why. There are just so many wonderful, and unique, heirlooms out there too, it would be a shame not to grow them.
I know it must be tiresome to keep hearing but am constantly astounded as to how busy your life is and how extensive your knowledge. I’m sure there is a whole team at CV and you just front it! Everything seems to work like clockwork here and even the heirloom plants do as they are told.
p.s. just catching up with your other posts too – its like a day out at Curbstone valley from kitchin garden, to native plantings to goats and chickens and bees. Life in England would have been quite different!
There is a whole team here…the gopher team…the vole team…team squirrel…the deer team 😉 The rest is just the two of us, but I am starting to feel like there’s not quite enough of us to go around. Maintenance here alone keeps us busy, and it can be challenging factoring in new projects sometimes. I love it though, and you’re right, I don’t see that this would have happened if I’d stayed in England!